If you have encountered some coolant in your oil or oil in your coolant, the first place to look is your IDI Oil Cooler. These are good candidates for inspection because of the following factors:
- Both fluids are highly pressurized in the cooler
- The o-rings and gaskets can fail
- The oil-cooler is not infallible
- The headers have been known to crack
Considering the aforementioned statements, given enough time and use, an Oil Cooler assembly can and will eventually fail. And without proper repairs, it will lead to engine failure and/or coolant infiltration. Just to quickly explain the Oil Cooler’s purpose, it cools oil from the crankcase through a small radiator-type network that is encased in a chamber of coolant. It is located on the driver’s side of the block, and has ports for coolant-in, oil-in, coolant-out, and oil-out. Also, it holds the oil-filter head and filter.
When people talk about the oil cooler, they sometimes forget that the oil cooler setup is a whole assembly.

The Oil Cooler Assembly Contents:
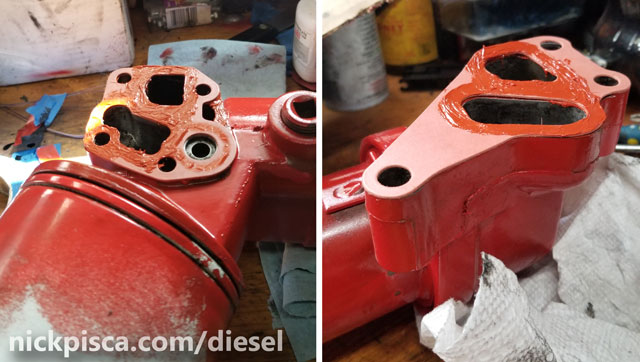
- Front Oil Cooler Header (Red in the image above)
- Rear Oil Cooler Header (Grey in the image above)
- Front gasket and rear gasket (on the block)
- An Oil Cooler (cylindrical in shape)
- 2 thin and 2 thick oil cooler o-rings
The assembly consists of two “headers” that mate with the engine block with gaskets (Note, the front gasket is different between the truck and van, read more here). The headers cap the Oil Cooler cylinder on each end, and four o-rings prevent the fluids from mixing. On the rear header, there is a port for the installation of the engine’s crankcase oil filter.

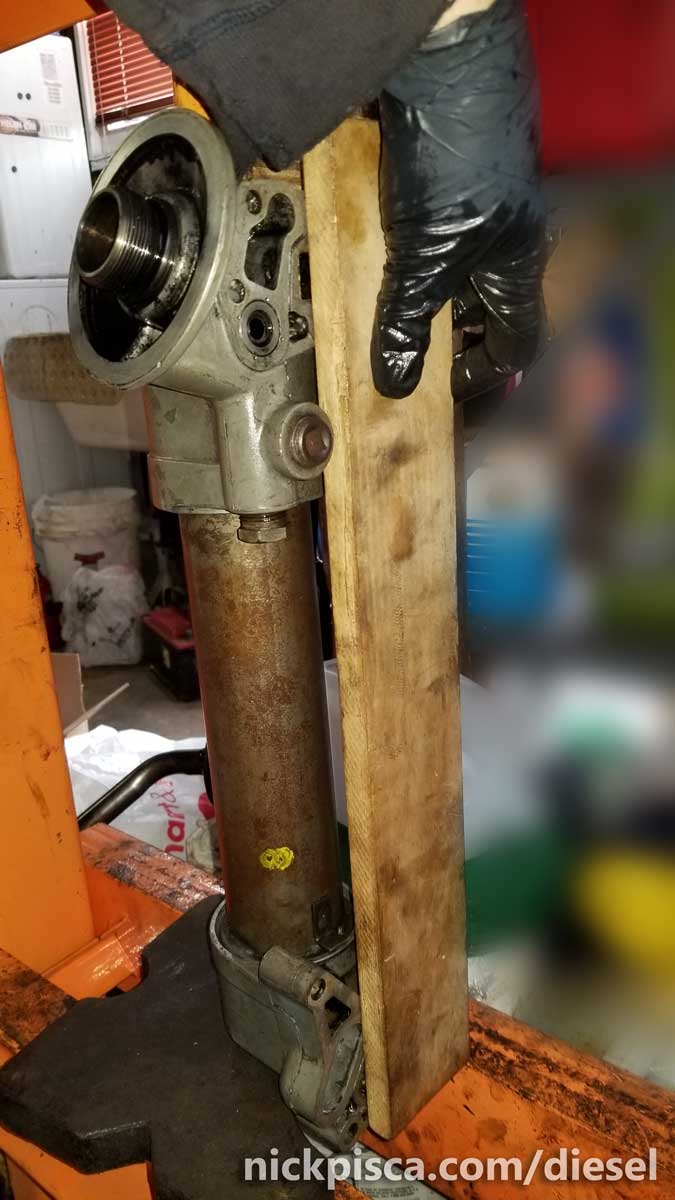
In order to separate the headers from the cooler, I had to pry them apart. It’s kind of a pain in the ass. The rings get rigid and brittle, and they do not want to let go. International Harvester designed the cooler to have two tabs on each end to aide in the prying process. It is imperative the prying action doesn’t bend the tab over, but that is almost impossible. I just had to do my best in trying to work it at its lowest point so that it doesn’t get too destroyed.
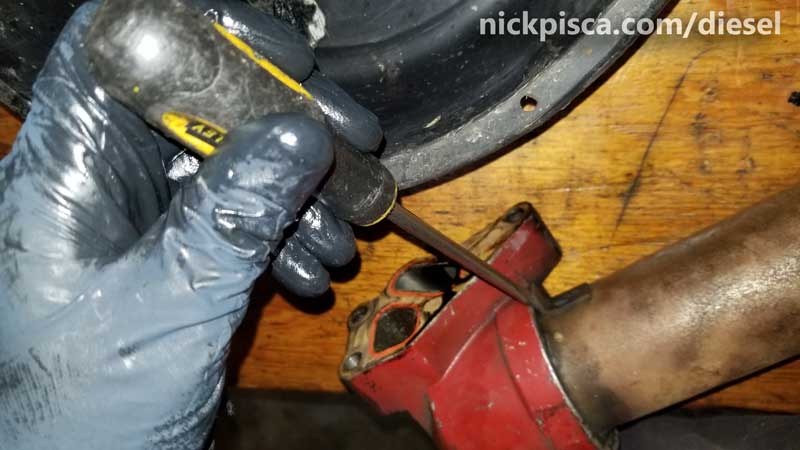
Eventually the headers will come off. The duration of prying is usually related to the age of the internal o-rings. The headers will eventually slide off without any effort once the cylinder clears the lip.

Once apart, the oil cooler is pretty simple to handle and fix. Careful to not damage the o-ring metal surfaces, I slid off the o-rings. Mine were so brittle that the fat o-ring broke in the process. Not a big deal, considering I’m replacing them anyway. There is a lot of buzz about the “best oil cooler o-ring” brand on the typical IDI forums, but I’ve used a bunch. All seem to work the same, so I have no major recommendation, unless one of the manufacturers wants to advertise on my blog. Hint, hint….
With all the parts separated, I properly cleaned the mating surfaces as best as I could with brake cleaner and other chemicals. I removed the gasket material from the block surface, and from the header surfaces. Also, I wiped down the oil cooler. Also, this is a perfect time to try my DIY Oil Cooler tester.
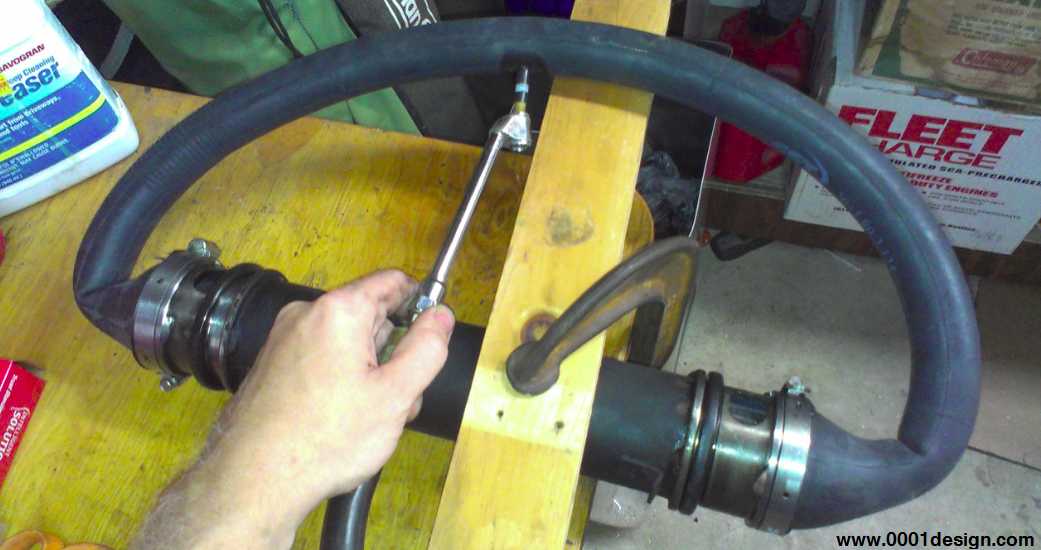
It is not going to put out the pressure that the coolant system (approx 13psi) and the oil system (approx 50psi) will do, but if you let it sit overnight, it will at least inform you if the cooler has a pin-hole leak somewhere. I’ve looked all over Los Angeles for a shop that could test my cooler, and for these old IDI engines, no one would entertain the notion. So, for now, this process is all I got.
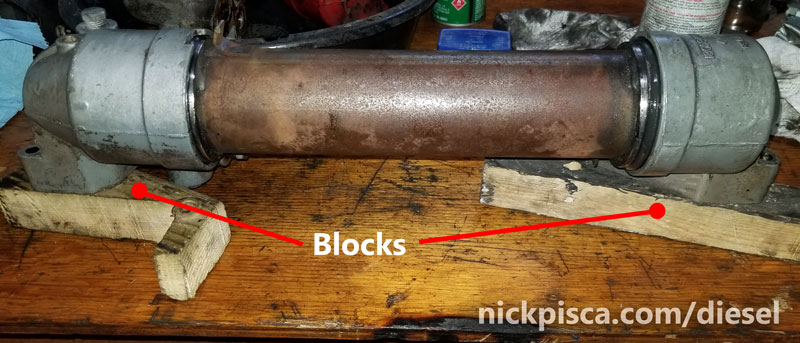
When installing the new o-rings, coat them liberally with vaseline. This will conduct two purposes: 1.) lube the rings to make them easier to slid on the oil cooler cylinder, and 2.) aide in the reinstallation of the header caps. Once the o-rings are seated, I slid on the header caps as far as I could humanly push them. Then using same thickness wooden blocks (see the image above), I aligned the block mating surfaces so they are flush. If these are not flush, it would be very hard to rotate the caps to the proper orientation once the o-rings and headers are pressed into place.
Here’s the point in the process that is better explained in a short video, shown below:
If you don’t have Youtube or can’t view the video, I’ll summarize the pressing process. Using a shop press or floor jack under a workbench or sturdy platform, I try to align the headers and cooler as best as I can. The problem is, there is not way it will perfectly line up, so all I can do is get it close.
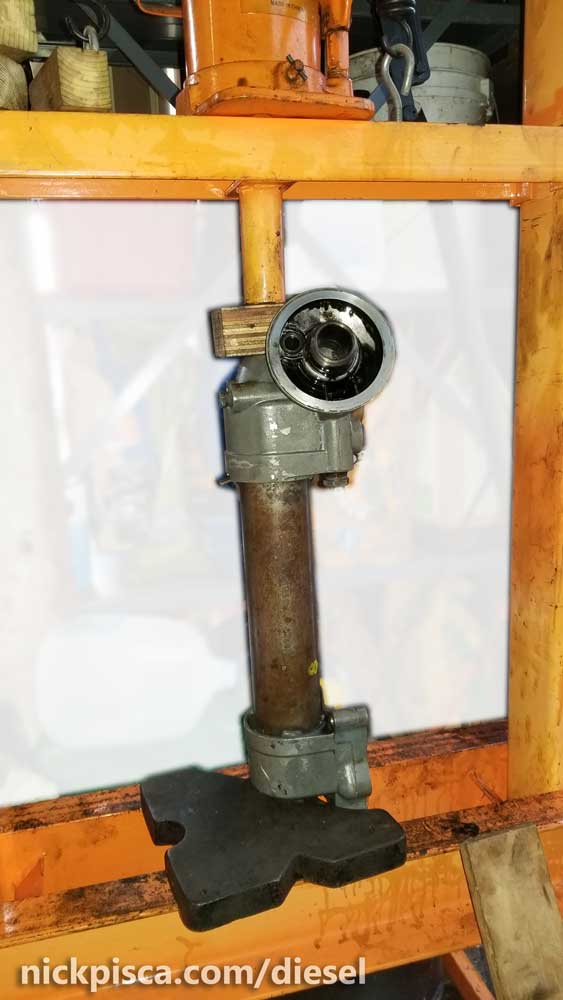
I seat the bottom header on a press block and align it with the press piston. Using a block of wood, I made sure my gasket surfaces haven’t shifted.
Then, using almost NO force from the press, I start jacking it together. It is crucial that no major pressure be applied to the cooler assy. As I’m jacking, I’m making sure that the cooler assembly is still move-able inside the press. If I can’t wiggle it, then I know I’m doing it wrong.
As I’m incrementally pressing my headers on, I’m wiggling the cylinder. The point of the wiggling is to make sure that I get the cooler “lip” flange inside the lip internal to the header. If they conflict, it will cause the o-rings to break/cut or to damage the header. The crucial process here is to make sure the wiggling allows for the cooler to find a path thru the header lip without clashing. The more it wiggles, the more likely it will smoothly find a path
NOTE: A no point should the process of pressing this together should it take extraordinary force. If there is major force, you are doing it wrong. One guy on Youtubes was trying to compress his Powerstroke oil cooler assy with a floor jack and his rear bumper, and he literally jacked up his truck with it. That’s just wrong. With proper wiggling and agitation, it should slid together without issue.
Like I wrote before, it’s easier to see in my video. It’s just something with enough practice and muscle memory, you get a feel for. Hard to explain in an article.
With the oil cooler off, this is a perfect opportunity to do my top-bracket bolt replacement on your van. These vans have an odd motor mount bracket that has this bolt that is too long. Replace it with a shorter one like shown in this article.
Once the assy was together, I gave the whole assy a new coat of engine-rated high-heat paint. I also prepared the mating surfaces for the block gaskets. Some gaskets will come with sealant built into the gasket, but for some reason on this rebuild kit I was using, it was absent. So I took the liberty of coating the potential problem areas with a thin layer of permatex sealant to aide the paper gasket.
I let the gasket get a little tacky, and then situated it on the block. Then I tightened it down to finger tight, then let it rest even longer. After an hour, I torqued it down so that the gasket maker had a little resistance when I forced it. I can’t remember the torque spec I used…. Maybe 24 ft-lbs. It’s been a few days since I wrote about it.
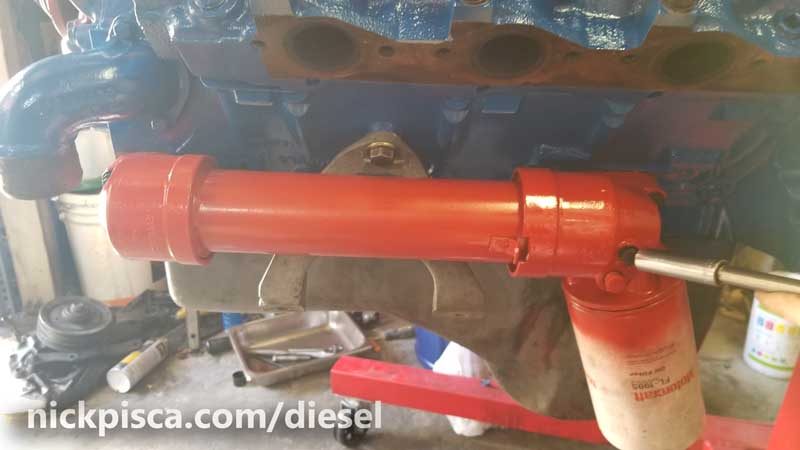
That’s it. Of course I did this on the engine on the stand, which makes the job really easy. But lucky for van owners, they can slide this oil cooler assembly quite easily on the block with it installed in the engine bay. It’s tight, but with enough finagling, it can be fished in and out of the spot behind the motor mount. Be sure to use gasket maker to keep your gasket in place while you are finagling it the parts. It’s very easy for some of the gaskets to fall on you, and it’s really hard to do without a partner making sure the gaskets fit properly.
For IDI Truck guys, I hear you have to lift the engine to get these off and on. Bummer for you. I’d feel sorry for you, but then again, this is basically the only real advantage that van guys have over every part of the IDI engine in a truck. So na nana na na na….
No warranty. You are responsible for your vehicle. For novelty use only. Not responsible for anything or anyone. Not responsible for damage to your vehicle, you, or anyone or anything.
Copyright 2000-2018 Nick Pisca 0001D LLC
