If you own an older Econoline, you likely have a steering and suspension system that is pretty sloppy. While there are several factors that impact the looseness of the steering (king pins, bearings, steering joint, etc), one of the likely causes of major steering slop is the tie rod system. This article details my latest tie rod replacement process, along with new steering stabilizer bushings and anti-sway bar mounting hardware.
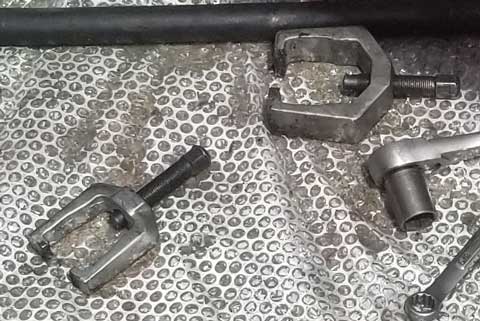
Tie Rod Puller Tools
The removal of the tie rods is not a complex process. There is only one specialty tool that one needs to obtain prior to starting this: a rod puller (image to the right). It’s a “U”-shaped piece of metal that when torqued down, pushes the tie rod thru the hole. All of the other processes of the removal and installation can be conducted with a basic mechanics tool set. If one does not want to buy one of these relatively cheap tools, they can be rented at any typical auto parts store.
Preparation:
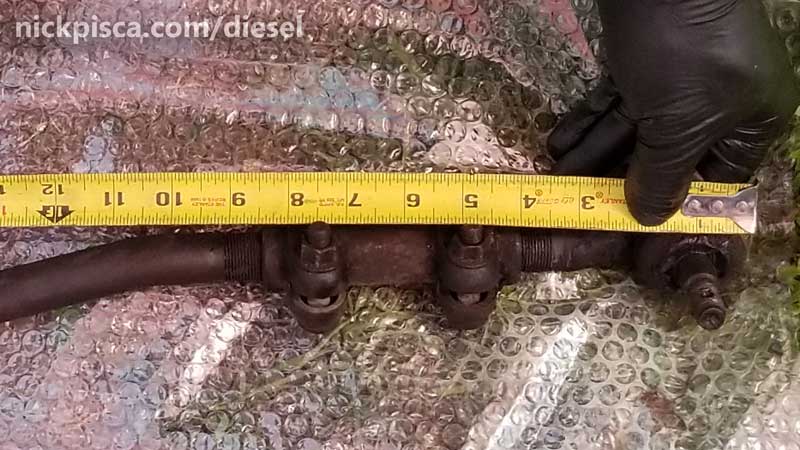
I was doing this job on the cheap, so I wanted to get this as good as possible without splurging for an alignment directly after. Eventually I did get an alignment (as everyone should), but I had some stuff in the meantime that wouldn’t allow me to conduct one, so I had to put this back together as closely as possible to the older setup. So, in order to make sure it’s close to aligned, I took a measuring tape and measured the distances for all the tie rods and suspension components. These numbers allowed me to reassemble to pretty close to it was prior to the steering job.
Tie Rods need to be greased regularly. When I would pump my ends with grease, they would immediately leak out of broken seals and boots, which means they are beyond shot. They are essentially running without proper lubrication, and every time I would splash a puddle, it would push more corrosion-producing mud and water into the apparatus, thus degrading the performance even more.
The condition of my old tie rods were less than awful. They likely hadn’t been serviced by the PO for a decade, and I hadn’t fixed them in the five years I owned the van. Here’s a few photos of the mess I had to deal with:

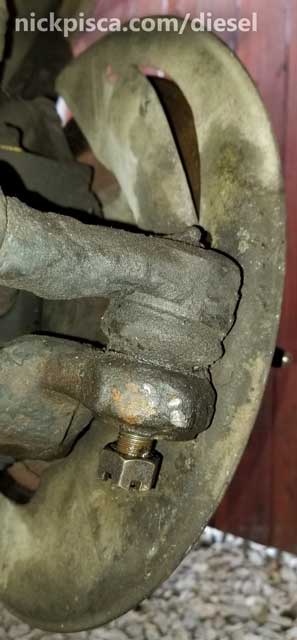
Note, those photos show my castle-nuts already broken. When I started this project, the castle nuts were pressed up on the underside of the mount, with a cotter pin preventing rotation.
The other end was the position under the Pitman Arm. It was probably the end in the worst condition overall.

When I would goop that pitman arm end, it would just seep out without any resistance. The boot was basically had the same consistency of a porous latex glove.
I ordered the following Tie Rod and suspension parts, that had the best reviews that I could find.
- Energy Suspension 45103R Steering Stabilizer Bar Bushing Kit
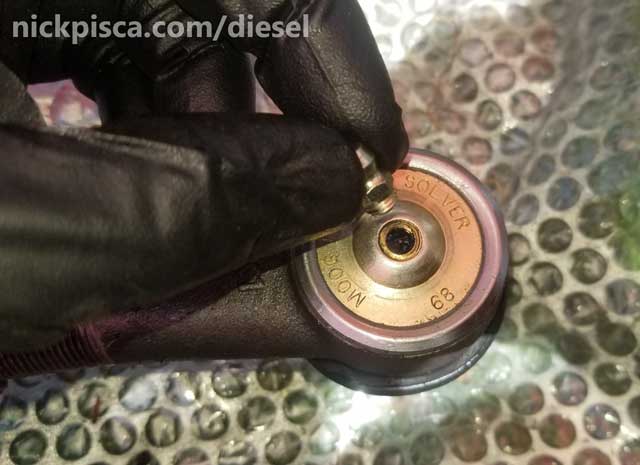
- Moog DS1175:P Tie Rod End
- Moog DS918 Tie Rod End
- Moog ES2914R Tie Rod End
- Moog ES2065L Tie Rod End
Once they arrived, I confirmed they matched the existing parts (so that I wouldn’t have to take them back if they were wrong) and then painted them red. Because I like red, damn it.
Once we busted the tie rods free, we pulled the whole tie-rod assembly off as one whole unit. This is imperative to my process of rebuilding the new assembly to the exact dimensions of the old setup, thus allowing us to hold off on the alignment for a while.
Here’s the old assembly (still constructed) next to the new red tie rods:

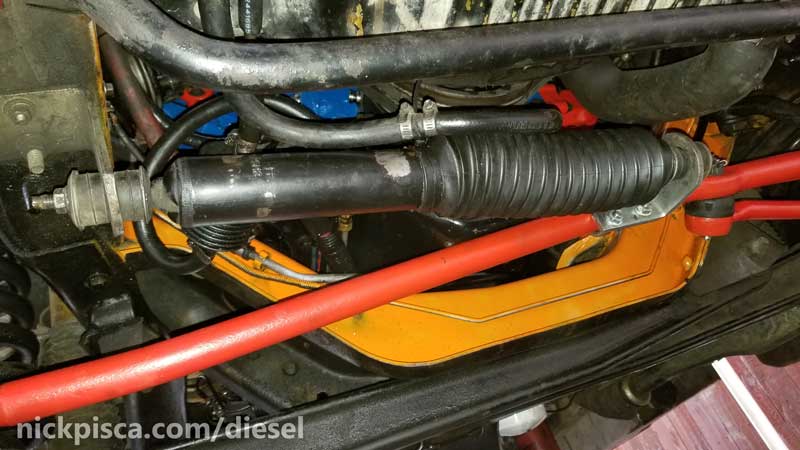
If you are wonder what that strut is doing horizontal to the tie rods, that’s my aftermarket steering stabilizer, which does a mild job of helping keep the van from meandering much on the highway. It would likely do a better job with a higher quality strut, but all I could get was a cruddy Monroe strut, that basically stopped working after 10K miles.
I measured the old assembly again, to make sure I have everything documented. The point here is to get it as close to possible, so I found a good datum to conduct my distance measurement.
I laid out all the pieces of the new assembly on the ground, and began transferring everything over. From the old setup, the only things I preserved were the adjustable couplers (#5 and #11 below), otherwise the whole setup was new.
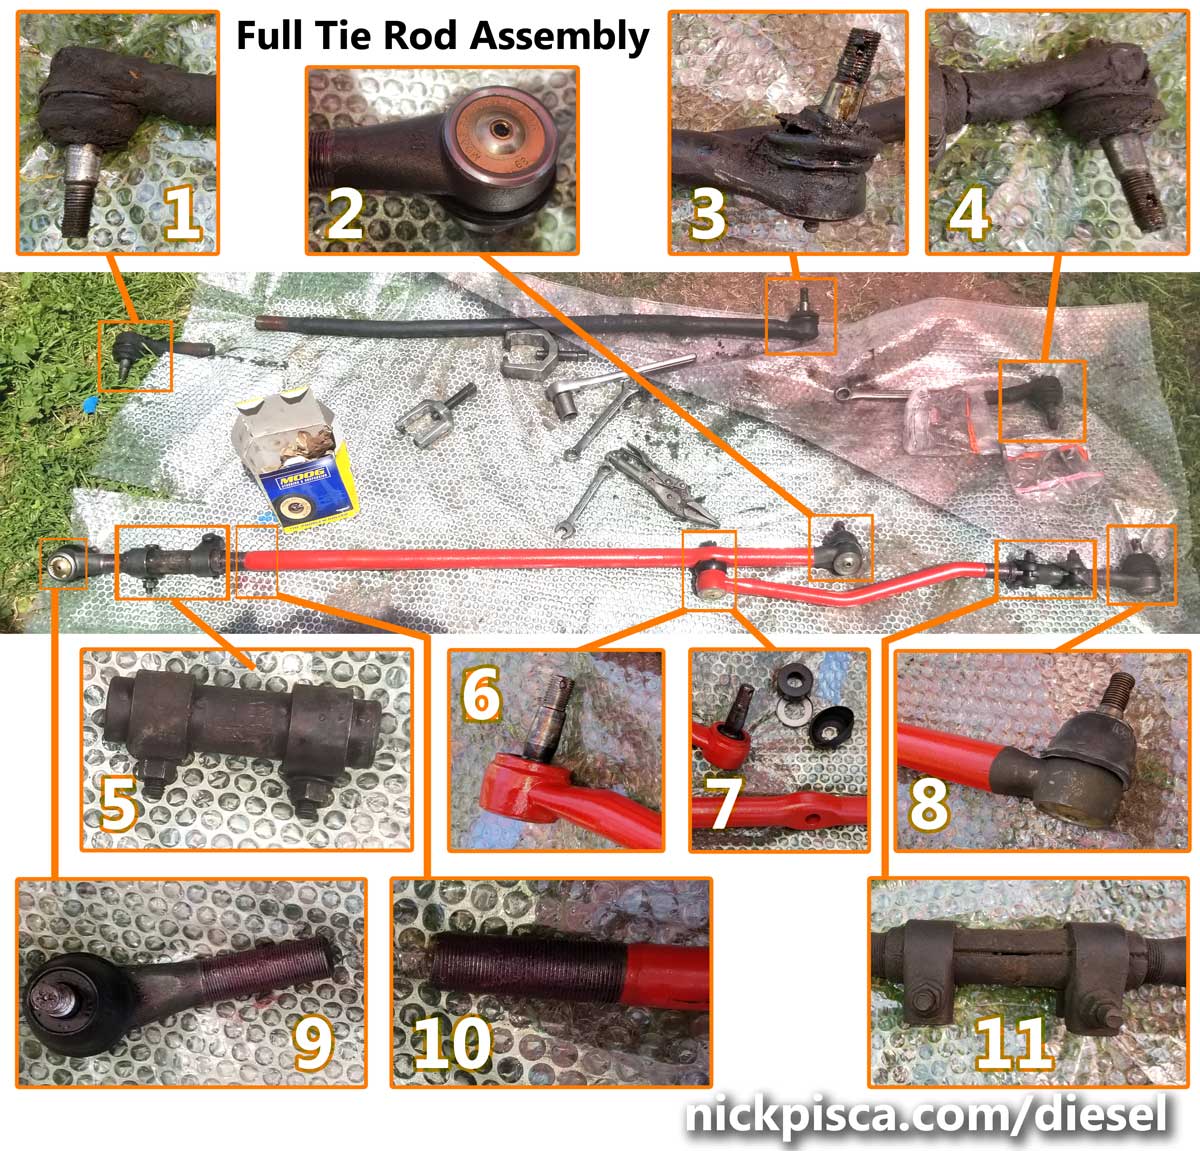
One by one, I greased all the threads and began swapping all the parts. I was careful to make sure that any Moog parts with the “L” or “R” designation fell on the “left” and “right” sides, respectively. (They are not interchangeable, nor do they have similar diameters if you wanted to swap them). The only tricky part was the orientation and order of the bushings for the center link to the middle end (#7 above):
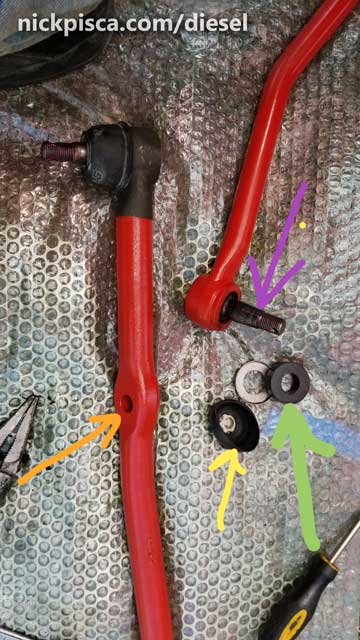
IIRC, I installed the metal bushing first, then the green-arrowed rubber bushing, then the yellow-arrowed cap, then pressed them through the hole and torqued the castle nut down.
With the assembly completed, I remeasured everything to confirm the lengths.

Then I installed the greasing nubs accordingly.
We installed the new assembly and measured it in place:
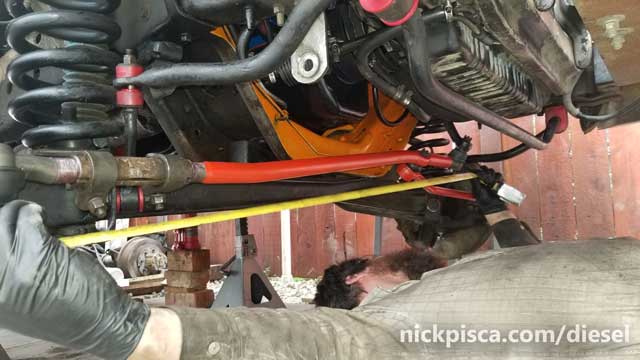
It panned out ok. Looked good too.
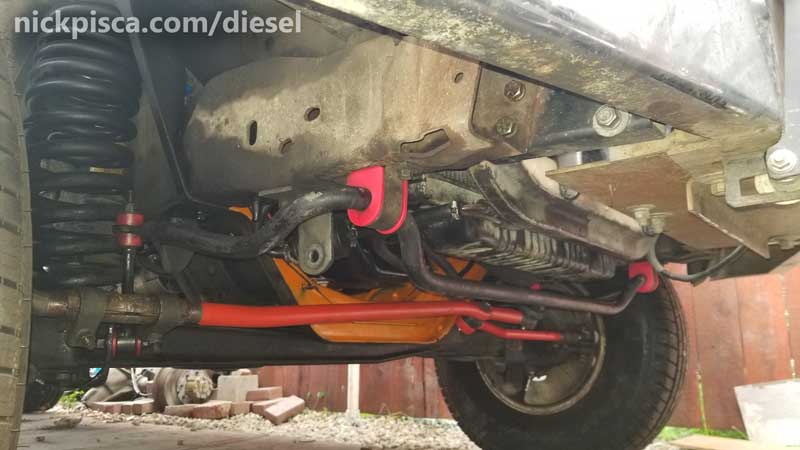
The sway bar bushings and stabilizer link bushings are photographed in that image above. They are red, and are not that hard to replace. Just undo the mounting bolts, slid on the new hardware, grease it because of the type of plastic (the kit should come with proper grease), and reassemble.
With it all completed, I reinstalled my aftermarket steering stabilizer, and it’s all good.
I took it for a spin and there was a substantial improvement on the steering. I don’t think it would be possible to eliminate ALL the slop on these old vans, but this tie rod job did a lot to eliminate 70% of the mess. It felt a lot better, especially on the highways with major cross winds.
No warranty. You are responsible for your vehicle. For novelty use only. Not responsible for anything or anyone. Not responsible for damage to your vehicle, you, or anyone or anything.
Copyright 2000-2018 Nick Pisca 0001D LLC
