
Transcript:
When I renovated my older Volkswagon TDI, I found several incorrect or broken trim clips. In Today’s Episode of Functional Printing: New VW Top Trim Clips
Preliminary note: If you are interested in buying a box of these VW clips, contact www.nickpisca.com/diesel/contact, which is the link in the description below.
Painting my Jetta TDI was a project I have been putting off for years. It wasn’t until the lockdown that I found the time to spend a few days renovating the vehicle. The clear coat had been completely destroyed by the California sun, and the paint and primer had been stripped away.
In addition to paint repair, I wanted to give some TLC to the trim and weathersealing parts, since they were looking bad. Not only was the condition poor, but parts had separated from the body, indicating the clips were failing. After pulling the stripping off, not only were most of the clips destroyed, but many were outright missing or worn away. Also a few were not VW clips, but aftermarket substitutions installed by a previous owner. They didn’t clip well or at all.
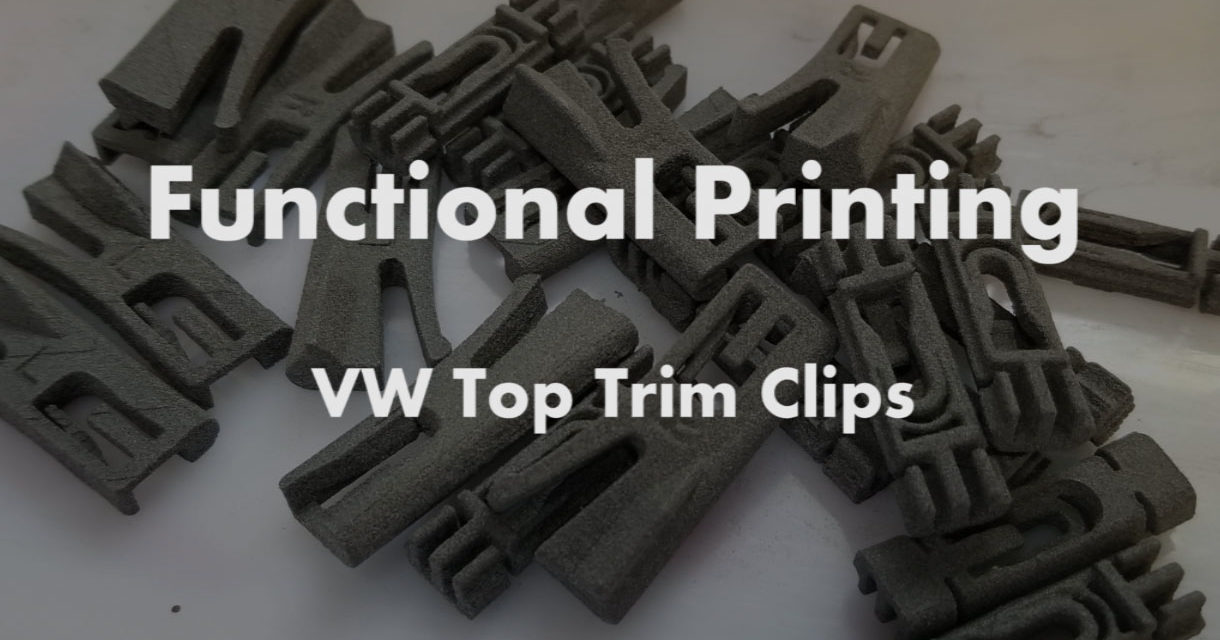
I took some time to review some of the VW documentation in the Bentley Service Manual and also find any information on the proper clips for these volkswagons, notably from 1993-2004. I found that three clips constituted the fastening components for this trim. I modeled up a close version of them in CATIA and exported them into a mesh format that could be used in my manufacturing process. It should be noted that this small size and highly detailed geometry couldn’t be possible on a standard printing setup, so my manufacturing process is highly suited for this type of production. There are many small flanges and hooks that need to be in tight tolerances to make this work.
Exporting these into several compatible resolutions was key to making this work in my production software. For some reason, it didn’t like high resolution meshes, so there was some back and forth in optimizing the export density without causing artifacts in the laser patterning. It was difficult because due to the small size of these parts (smaller than a AAA battery), low resolution meshes would impact the performance of the clip.
After several test runs, it was found that an export value 0.6 in CATIA afforded the least artifacts while orienting the geometry at a 0.5 degree in both the X and Y axes made sure the geometry didn’t cause issues. Also, by slanting the geometry this very slight amount, it allowed for a gradual sintering process without a sudden patch being applied.
The 4-door Jetta requires 12 standard clips on each side, and 2 labeled snaps for each row. The sintering process only took a few hours, since these parts are quite small and using my custom Maya-to-Central MEL conversion utility, I was able to nest the parts in the most optimal shallowest configuration to save time and materials.
My parts are very durable and are made from high-strength plastic, so it didn’t take very long to clean these parts up from the bed and get them prepped for sealing. I usually apply a thin layer of protective coating to further aide the already-durable plastic.
I ended up making a few extra snaps than necessary, just to fill up the lower bed. I should have used that space to make more of the standard clips (I needed about 4 more, but I was able to use some of the few older clips that were in decent shape) For future use, I’m going to revise the export model so that all the necessary clips for the 4-door configuration is in an entire job. I should be able to run 3 or 4 configurations at the same time if I increase the bed depth. If you are interested in getting a set of these VW clips, please find the link in the description below.
Now that I have manufactured, sealed, and coated my brand new VW clips, I needed to clean up the rubber on this top trim. I had just finished painting my car (check out my channel’s previous video for that project) and I wanted all the plastic and trim parts to be just as nice as the new paint. I bought this “Ultimate Black” restorer and tested it on some parts. It worked amazingly. The untreated trim is on the left, and the renovated trim is on the right. It seriously looks as good as new.
The trim is restored, the car is painted, and the clips are ready to be installed. It’s time to put this all back together.
Overall, it turned out really nice. I had to use a few old clips, and you can tell the older ones don’t hold the trim down like my new ones. The next print job I have, I’ll be sure to slip in a few more clips so I can replace any of the old ones with all new.
It was a fun project, and if you are interested in buying a set of these clips for the 90’s Volkswagons, find the link in the description below.


Recent Comments