
After a few days of calibrating and testing, I finally decided to put a massive STL model on the Sintratec software and see if it could handle it. Long story short: There were some issues.
I’m not discouraged. I figured this could be the outcome of being a little too audacious. Gotta learn from these issues and move forward.
Before I go on to the details of the 3D Printing issue, I just wanted to reiterate that there will be some more videos on the assembly of this animal. I know my posts and videos is way out of chronological order, but I just wanted to post my current findings while calibrating and testing the Sintratec Kit while it’s still fresh in my mind. Editing the assembly tutorials is a LOT of work, and it will take me a long time to get through all the footage and make it into something less than 30 minutes.
Back to the topic of the article.
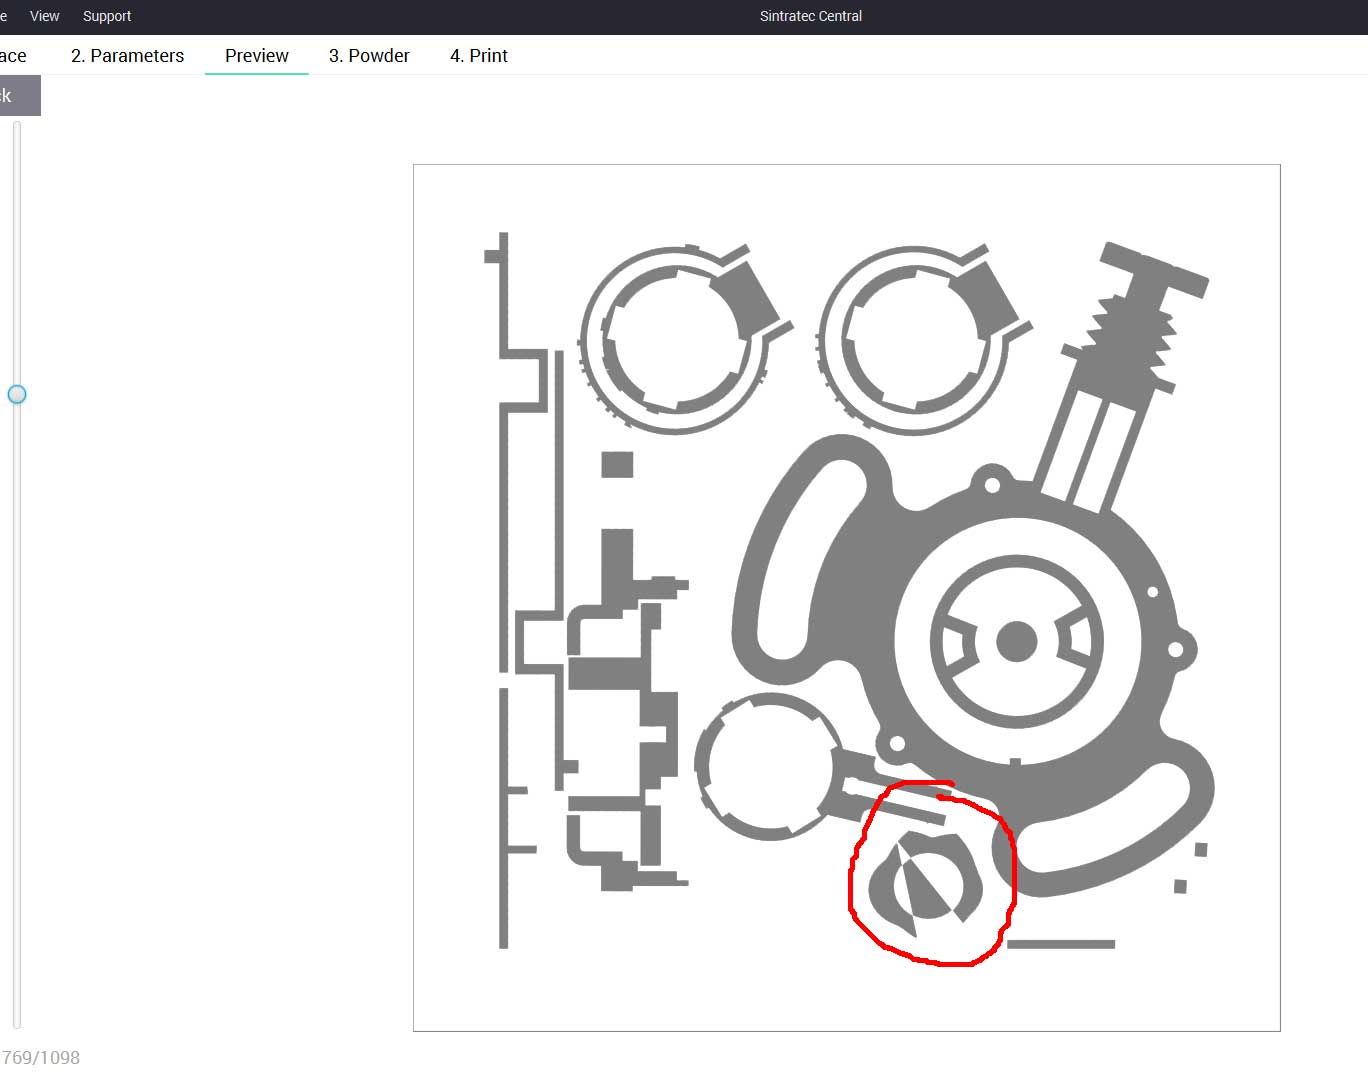
After fiddling around with small models, I felt it was time to try a massive model that took up the entire “practical” volume of the bed (11cm x 11cm x 11cm). The bed is actually 13cm x 13cm x 13cm, but you can’t use the outer centimeter because the items need that margin of powder to sit nicely and be supported. If you try to put an object in that margin, it will likely fail, as everything I’ve read online and everything my tech team at 3D Chimera has warned me.
Sintratec recommends that you use up as much space in the bed as possible, so that you don’t waste your powder. So I made this monstrosity:

This is DEFINITELY NOT the way you want to kick off your first real set of Sintratec prints.
But here’s the deal, I kind of knew that it wasn’t going to work. I basically wanted to see how and when it would fail, so I could learn to deal with it. But in the absurdly unlikely scenario that it would print with flying colors, then bonus. I gave it a go.
It should be noted that I didn’t model that monstrosity in Sintratec Central. Instead, I used Maya and loaded 8 different STL’s and situated them inside a dummy cube. Then I made several instances in that Maya scene and exported the entire group of STL’s as one massive STL. Remember that for later.
Once the file is loaded in Sintratec Central, the program slices and dices the meshes and makes layers. I had one layer that was odd. It had a strange corner issue
My colleagues at 3D Chimera said that happens every once in a blue moon. Basically, you can fix it by slightly rotating the mesh a tiny negligible bit. However, since I had made this into one gigantic STL glob, I would have had to go back into Maya, then adjust the sub-mesh and reexport it and I didn’t really care at this point. If the layer made an oddball sintered layer, I could just cut it out with an exacto blade if it finished without any issue, which I didn’t expect anyway.
For a while, it was sintering really nicely. Super spiffy. I bumped the heat up to 172º C because the previous round of tests had some curling on the perimeter and middle. I was hoping to curtail the curling for now with some extra 2 degrees of temp. Remember, 175 deg will turn your powder into a block. Keep is lower than that.
All was going well, like this:
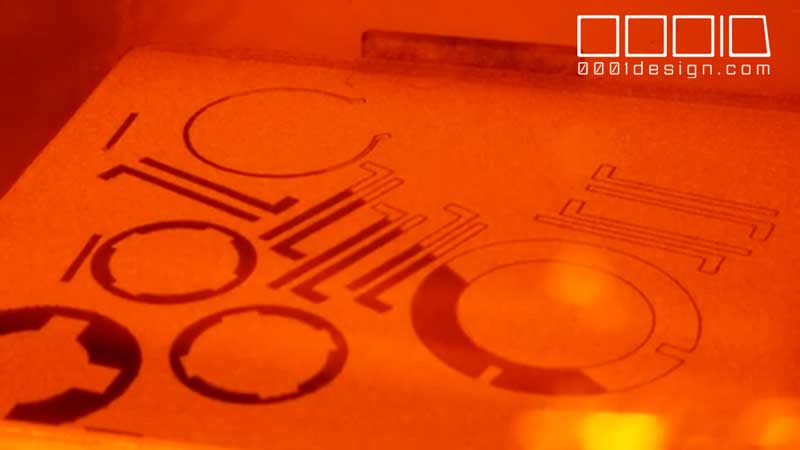
Clean edges, no curling, straight lines, good hatching, all good.
However, as it was 3D Printing, I noticed that after long sections of hatching the model, it would end with outline-hatch mismatching. Check out the video:
Bummer! The outlines were not matching with the hatch after a LONG pass with the hatch. Look in the image below… You’ll see the outline is raised up toward the Y direction of the bed, while the hatch is off by a half millimeter to the door.

I’m thinking it could be these possible scenarios:
- The big mesh is just too big. I should export each STL individually and open it in Sintratec Central. That will do the outline and then fill the hatch before moving on to the neighboring mesh layer.
- The Galvos were not as tight as I should have tightened them. They need to be a little loose so that a human can turn them when calibrating the laser, but not too loose that they allow the galvos to rattle out of their harness.
- The laser speed is off. I could try slowing it down a bit so the geometry has time to catch up.
- I still don’t know what I’m doing.
3D Chimera did warn me that it’s not customary to make one big mesh, because it just takes up more time to print. As you can see in the video, it hatches a diagonal line across the entire mesh. In some places, the outline had been sintered a full minute by the time the last hatch line is finished. That’s a long time between sinters.
I’m thinking of trying another test run where I export all the STL’s individually and import them into Sintratec Central one at a time, so that each outline is merged with its respective hatch directly afterwards.
I ended up aborting this print because near the front-left of the bed, I got some light curling on the perimeter of my model. I think the corners on this machine are no-go for most geometry. I couldn’t adjust the temps and laser speed to get the corners not to curl, and eventually one curling line caught the powder fin and f’ed up my bed. I just canceled it and let it cool down so I could examine the few parts that did finish. Besides, I new the model would have been garbage anyway due to the mismatch hatch anyway.
I think it would help with the corner curling if I split up the STL’s as well, because I noticed that when the outlines are made, they pull up a bit due to the thinness of the line. Maybe if I doubled up my outlines, and I made sure every hatch was filled directly after that outline was sintered, then what little bit of curling that occurs on the corners of the bed would be mitigated. I’ll have to keep testing that.
So the consensus is to break up the model and make sure my galvos are secured in their vices. A little preview of my upcoming article… I hacked into the Sintratec native file extension (the .stec file) and found it to be a compressed file containing the stl’s, a json ID file, and an encrypted “data” file. I plan to make a plugin for Maya, Rhino, and CATIA to export directly to Sintratec Central, so we don’t have to manually load up all the STL’s and situate them in the virtual bed.
Onward.

Recent Comments