I finally feel like I’m getting over the hump on this conversion project. The donor front wheel drive parts are completely restored, with new paint, bushings, seals, bearings, and the list goes on. Time to make room on the 1988 Clubwagon for this Quadravan axle!
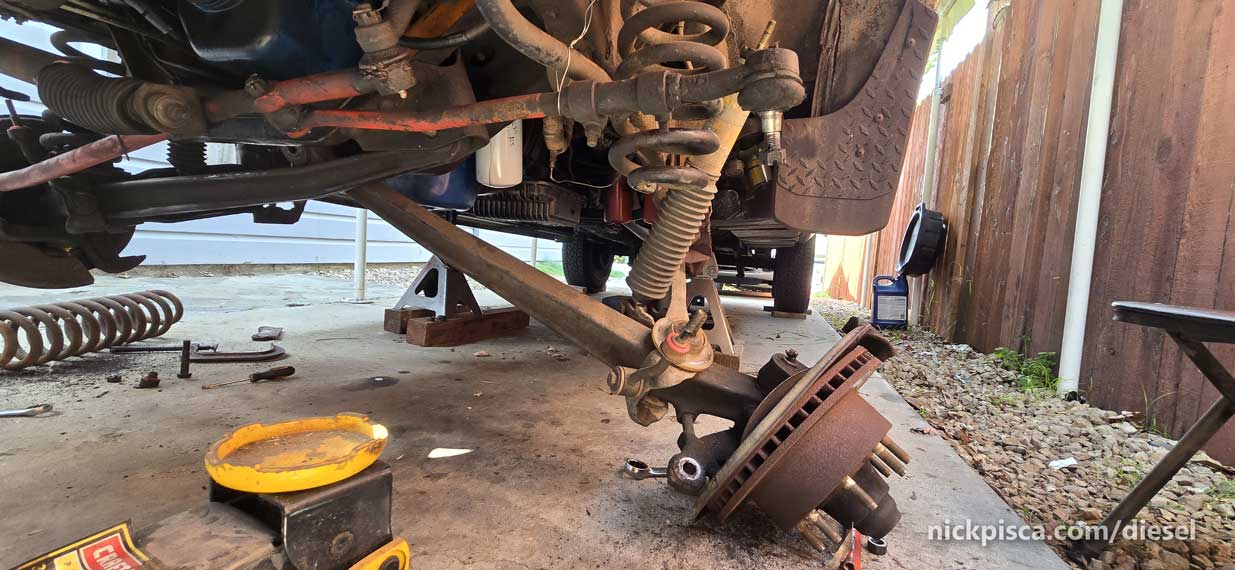
This is stock from 1988:

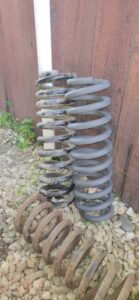
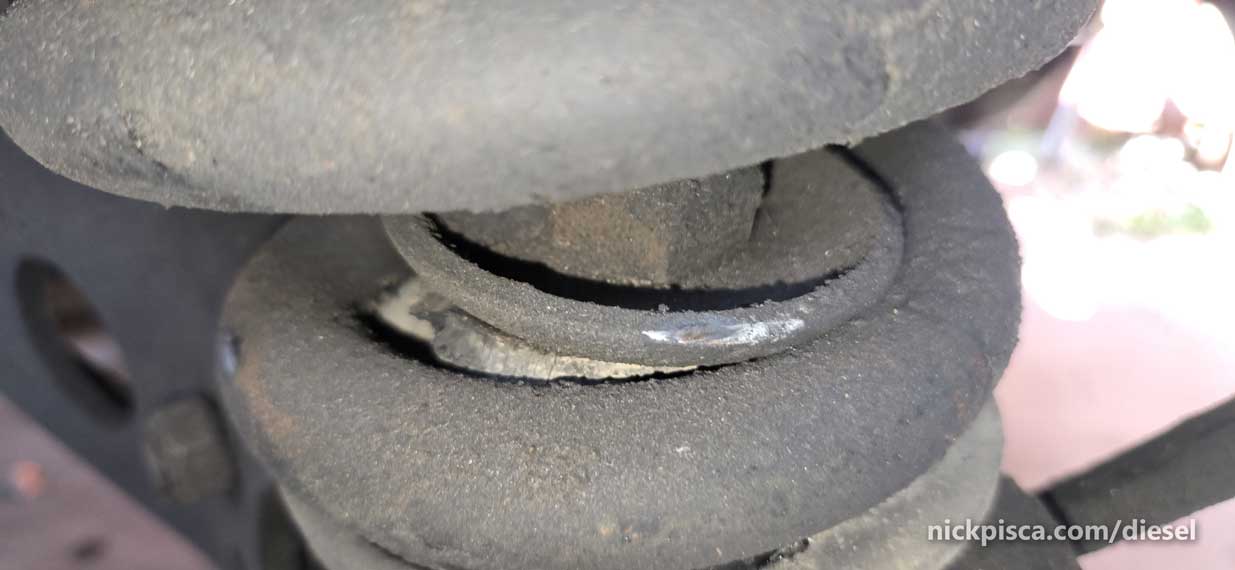
Upper left: HD RV coils. Upper right: Quadravan coils, from the donor truck. Lower: Stock Econoline Coils, from 2018.
What needs to go? Pretty much everything. The I-beams are the main intrusion, and the i-beam brackets as well, which coincidentally are riveted on.
Instead of listing every single front suspension part, I’m going to mention the parts that I’m hoping will be usable with the quadravan project.
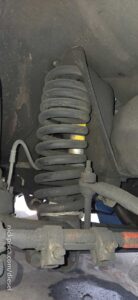
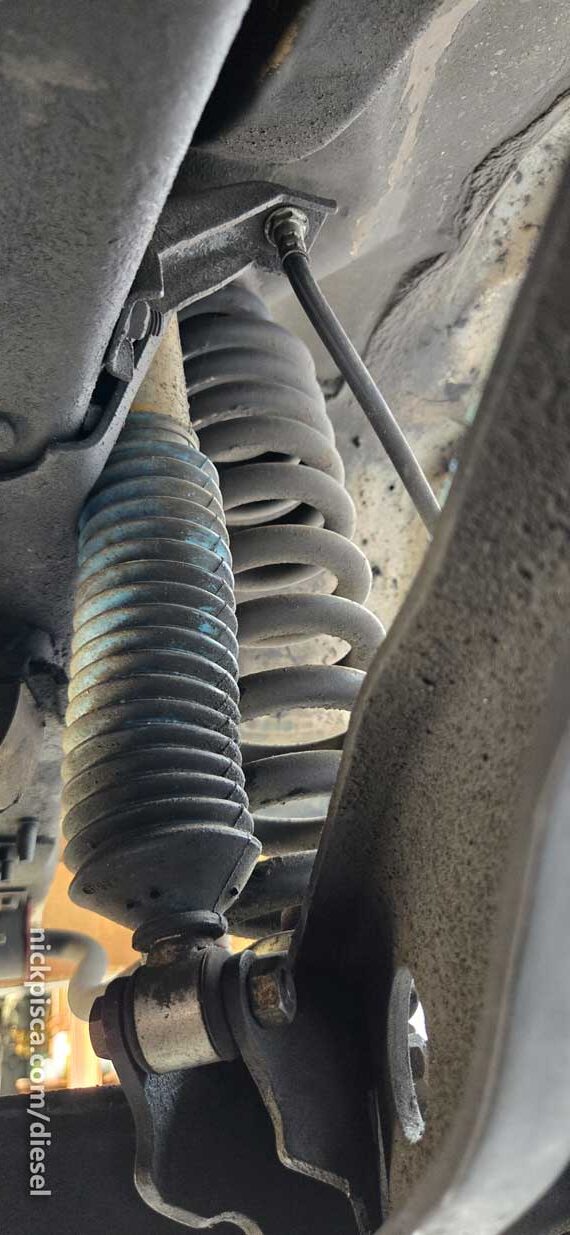
Stock coil receiver and HD RV coil, installed in 2018.
1.) The coil springs.
Back in 2018 or 2019, I bought RV coils because the stock ones didn’t hold up well with the 7.3 IDI engine, deep sump trans, deep sump overdrive, Warn winch bumper, and other items that bumped up the vehicle weight. So, I am hoping that these overkill coils will mate up with the receivers on the quadravan base. Also, these HD RV coils are designed to be progressively restrictive, so it should help a lot with stability and resistance.
2.) The coil receivers on the frame.
I did clean up the Quadravan receivers, in the case that I need to use them for the suspension bump stops. However, after seeing just how simple the bump stop design is, I could weld my own version without much modification to the existing the coil receivers.
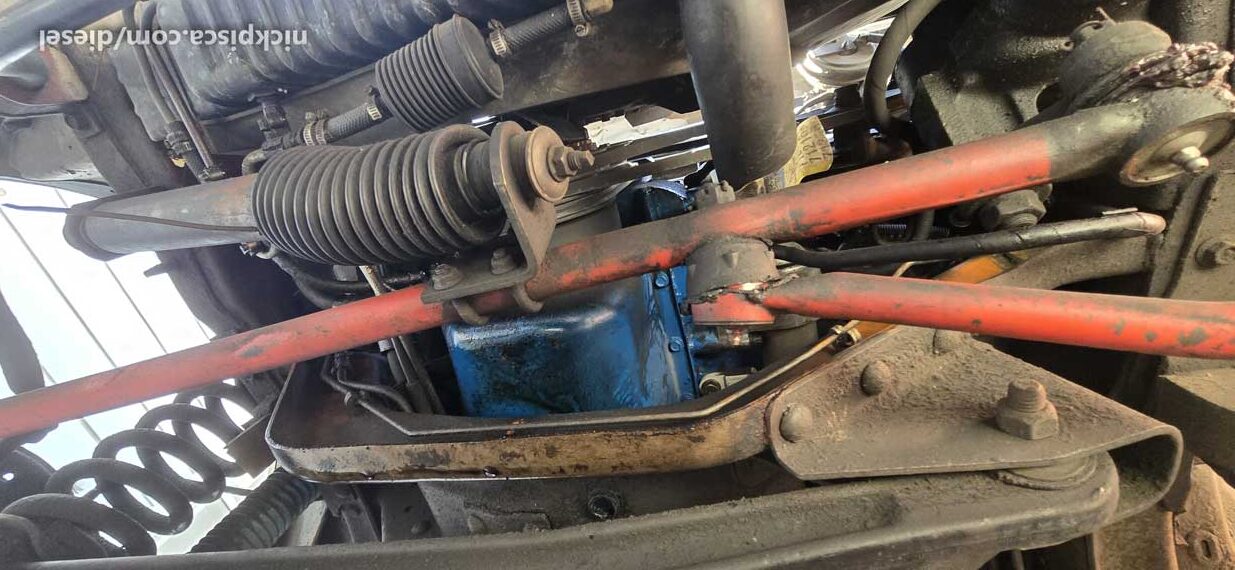
3.) The tie rods and pitman arm.
I don’t think this will work. I’ll post more about that whole strategy.
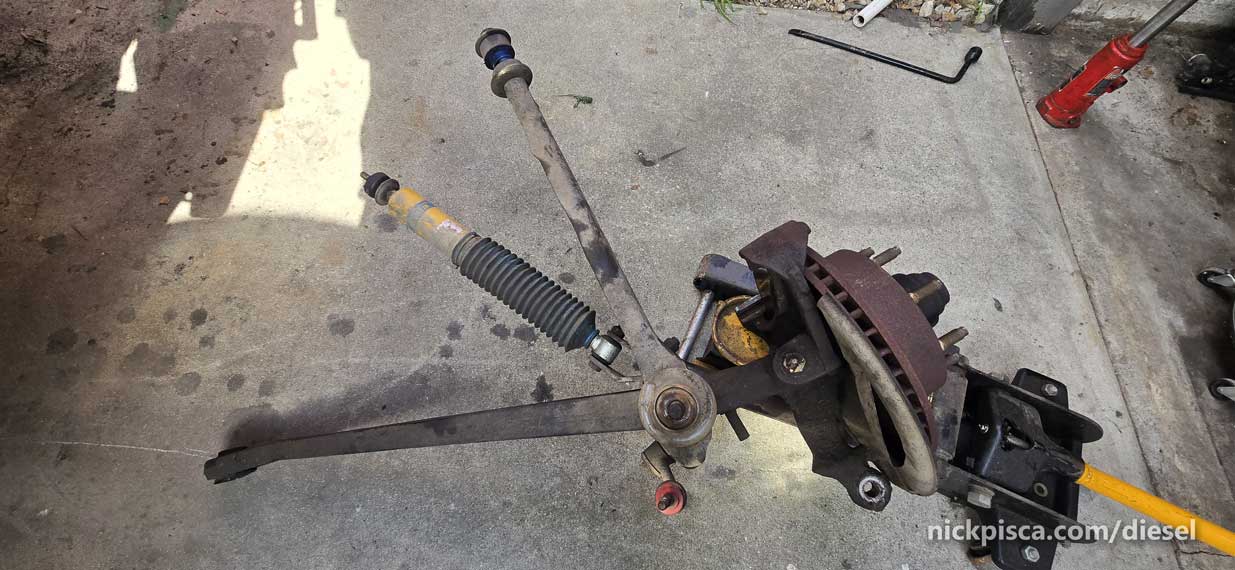
The rest has to be demo’ed.
I’m not taking these individual parts all apart. Just undoing the i-beam mounting bolt, the rad arm nut, and coil bottom nut and washer, then it should in theory, just… fall down.
But first, take the calipers off and hang them so I can deal with the brake caliper swap at another date.
I’d like to keep as much moisture out of the brake system, so leaving the old caliper intact will keep it sealed up. I know this conversion project is a long term item, so it might be a few weeks before I get it back on the road.
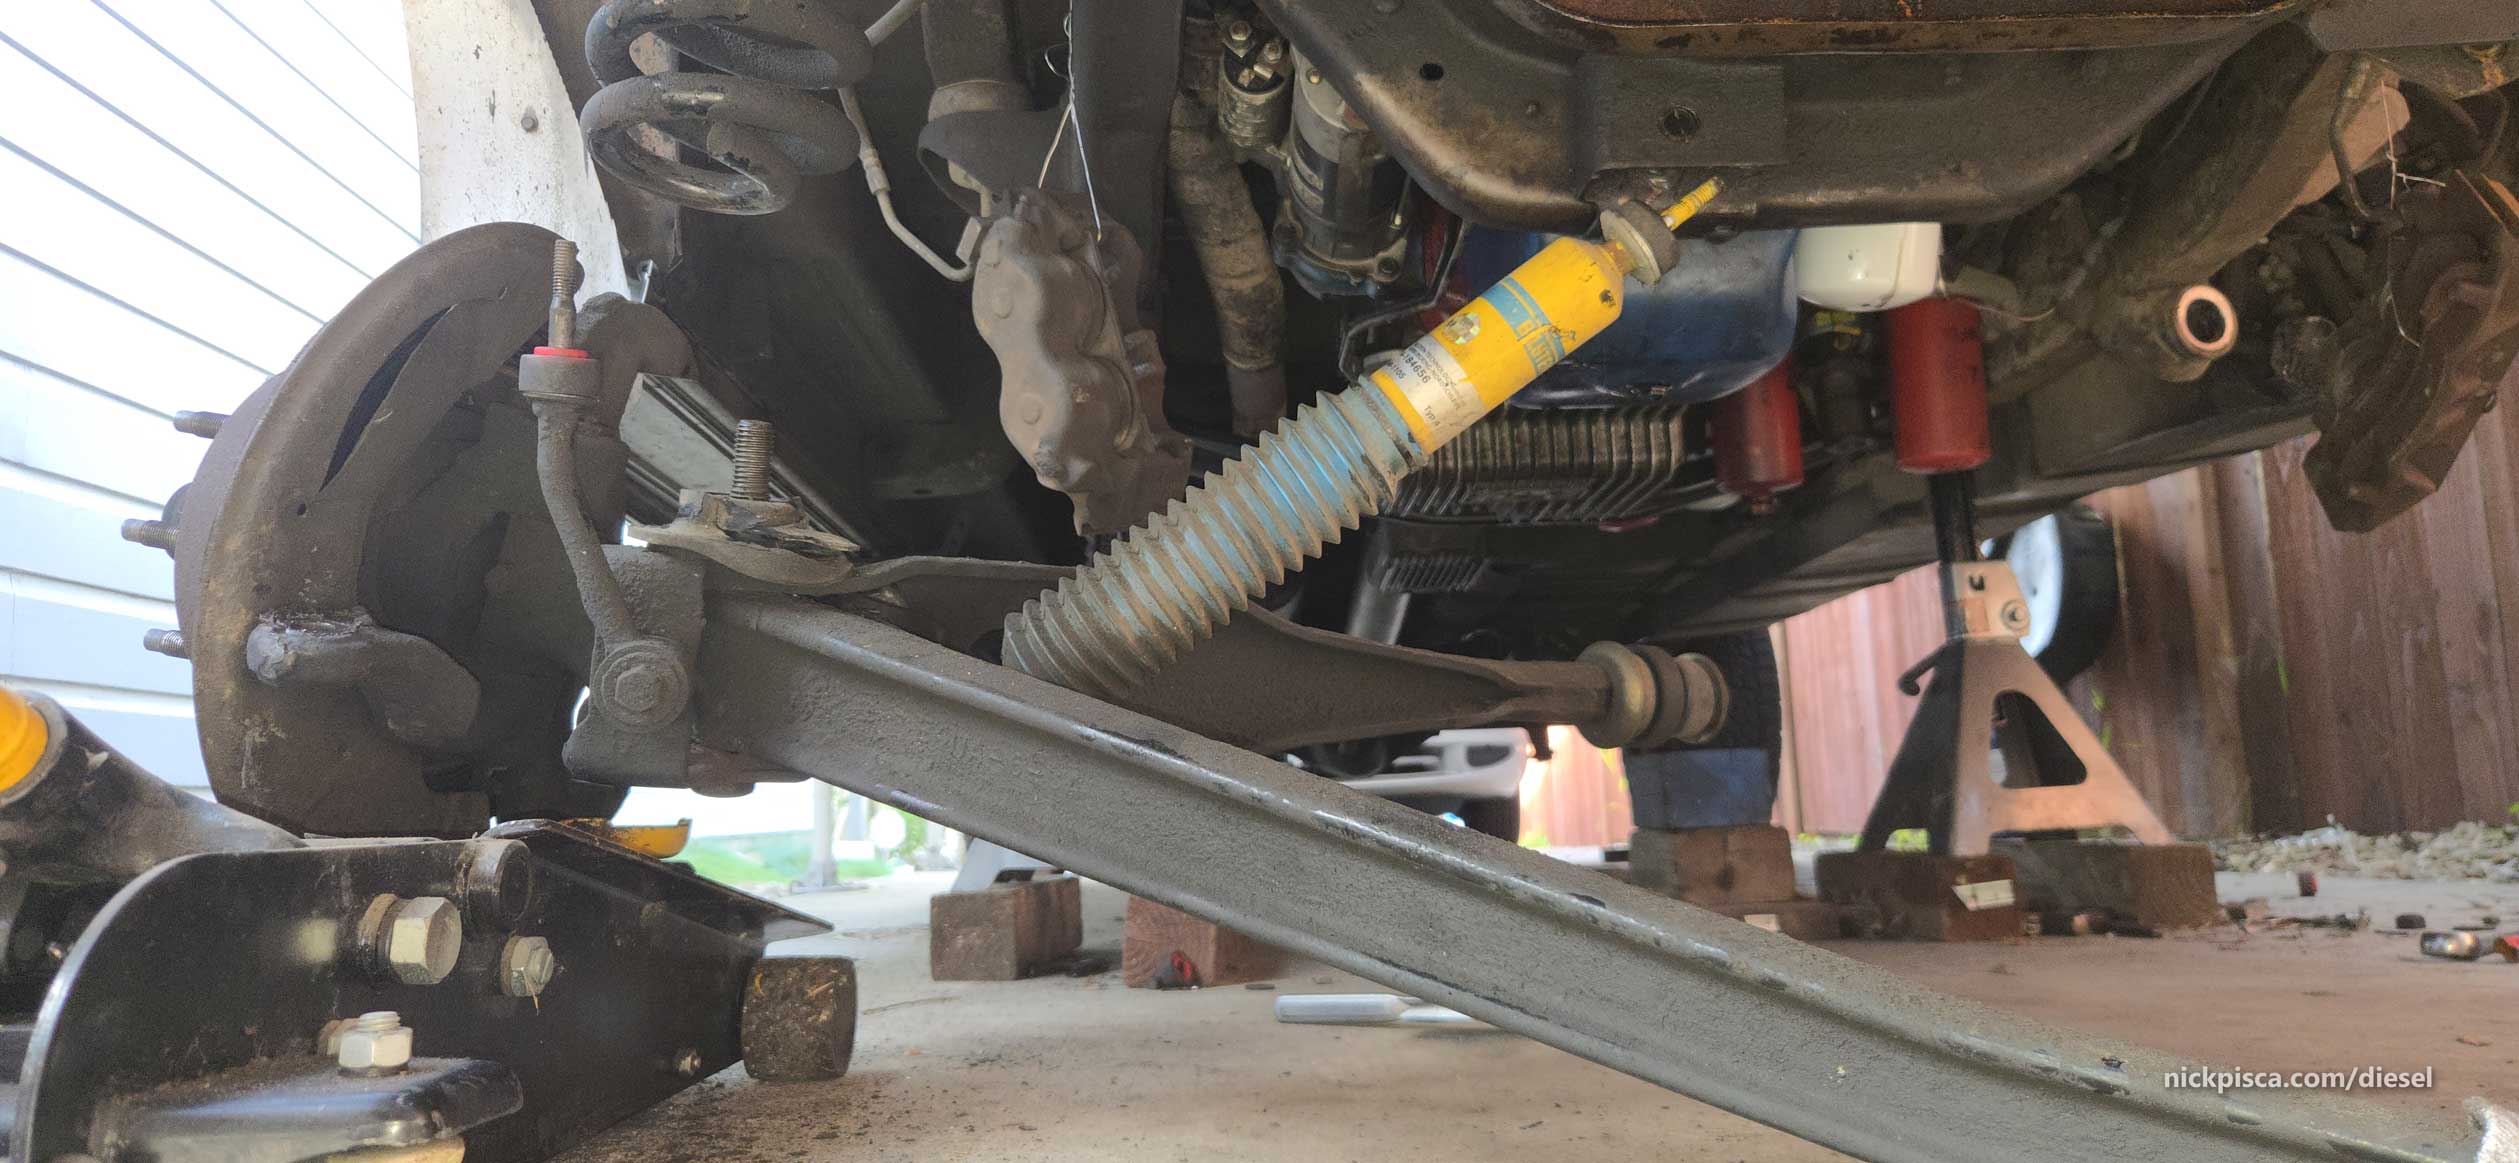
I kept the old steering stabilizer in place to keep the tie rods hanging in place.
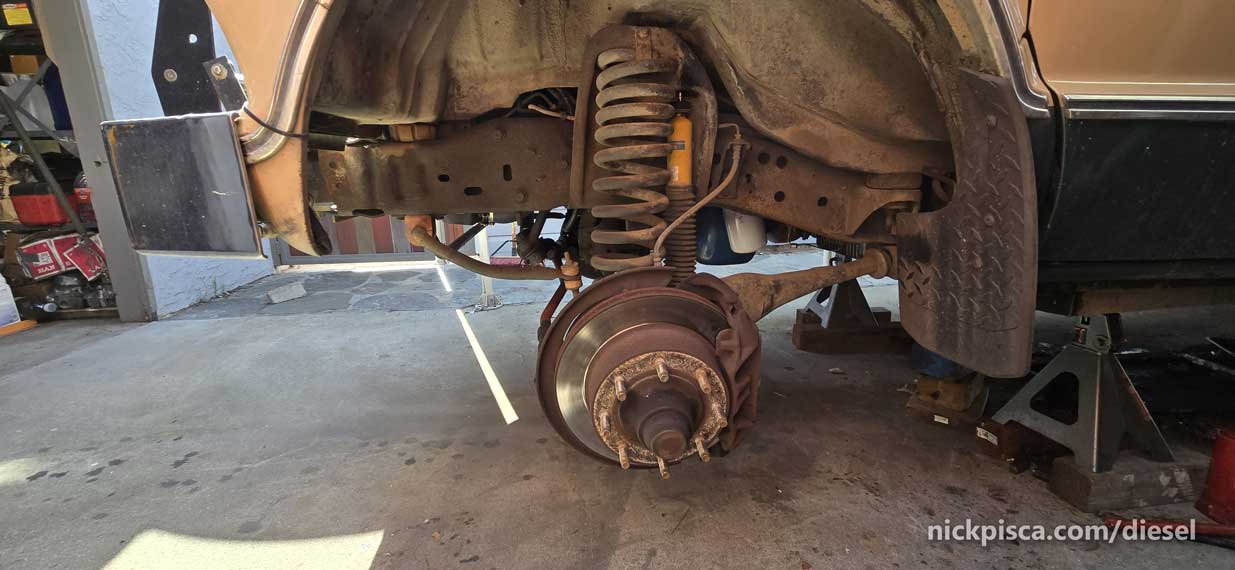
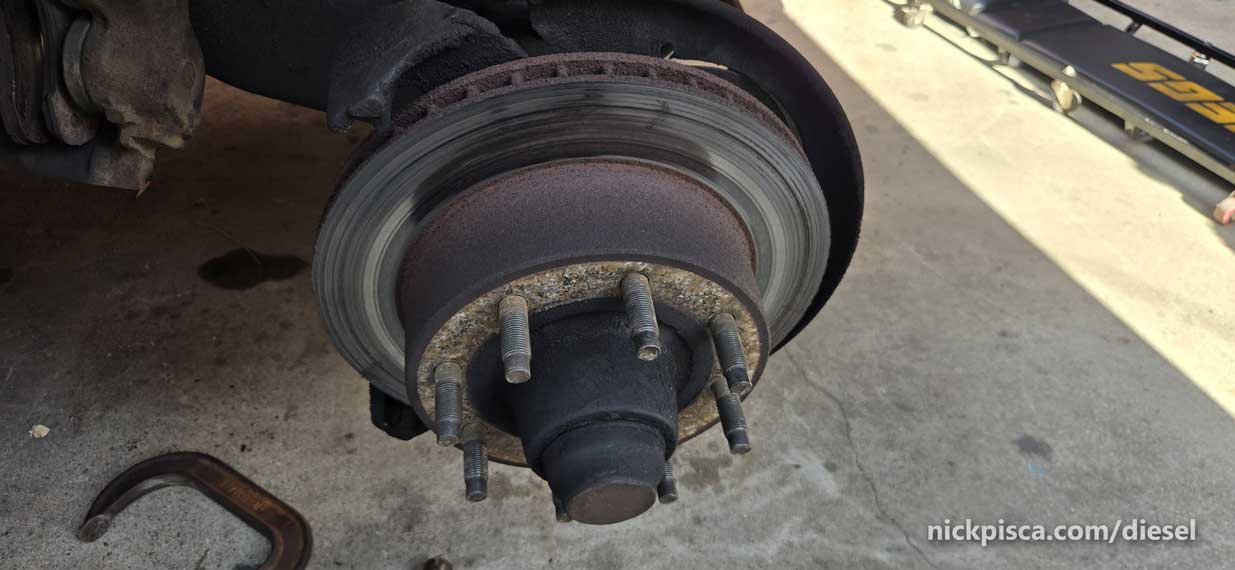
Holy cow, the rotors on this van are totally f’ed. Kind of a good time to do the 4×4 conversion.
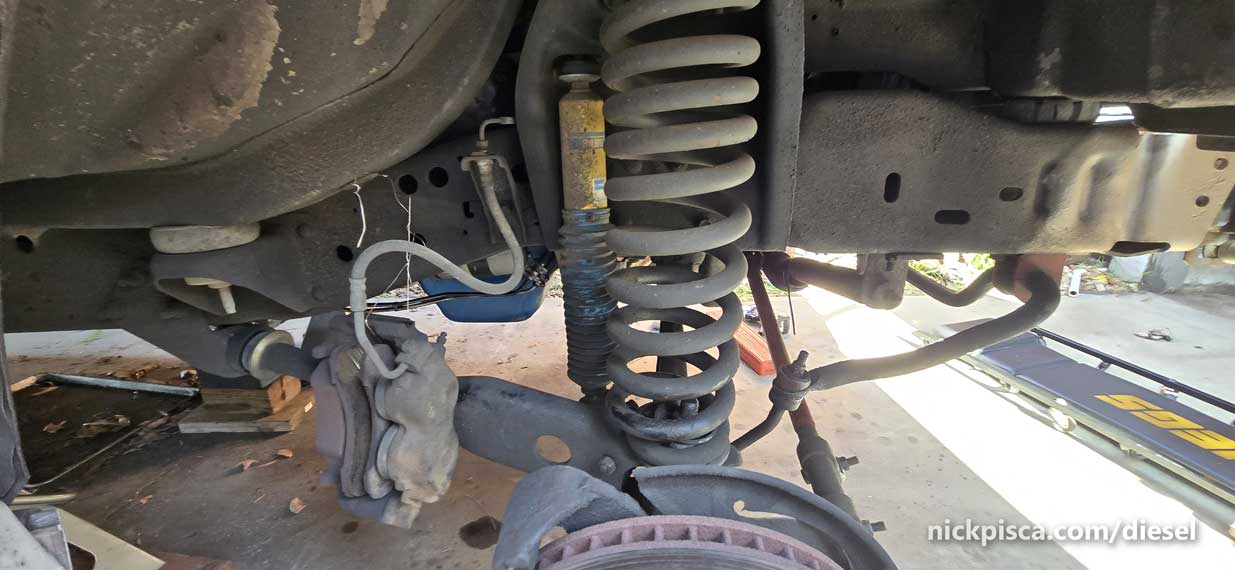
Find the 1 1/8″ open ended wrench and throw your arm out trying to break the nut on the bottom of the coil.
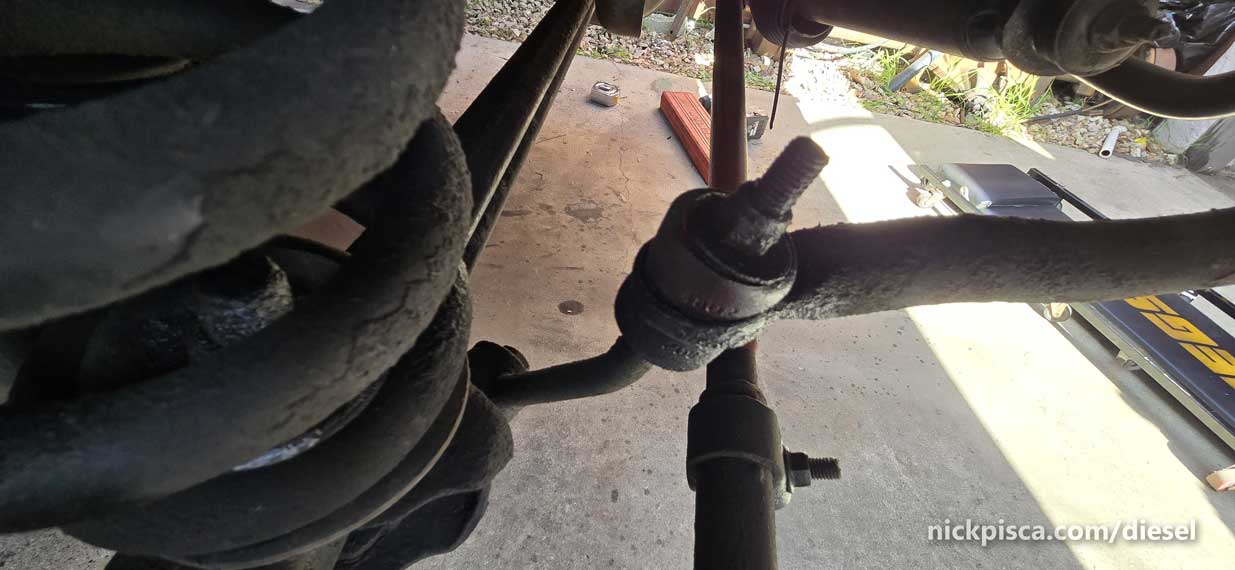
Almost forgot. Time to undo the sway bar link. Kinda crazy, but this was one of the first things I fixed on the van when I first bought it in 2012. Then we upgraded it with the suspension upgrades a few years later. So much has changed.
Radium Arm nut removal. (Foreshadowing…. these rad arm brackets have to go too…)
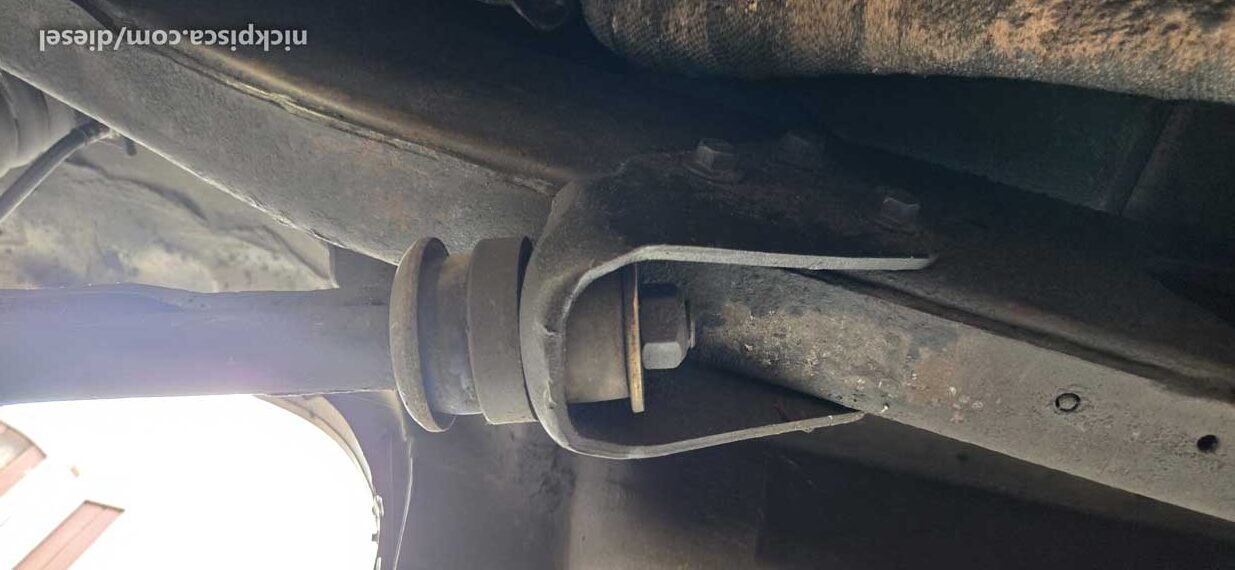
The i-beams have mounts to the bottom of the crossmember.
They criss-cross to give vertical movement to the wheels, and these i-beams have to go. Both I-beams have a simple nut and bolt configuration, that come undone with a 15/16″ wrench.
Also, remove the top nut on the front shock absorbers. BTW, I’d like to strangle the Ford engineer that left no room to get a socket in the space between the wheel well and frame.
If all goes well, the whole i-beam+shock+rotor+radius arm assembly will come down in one piece.
Boom.
In hindsight, I should have put that floor jack under the i-beam at the king pin area to keep it from just dropping down like a George Bush at a Japanese banquet.
I did it a little softer on the passenger side.
Drag those old parts over to the junk-pile in the backyard. They will be disassembled and archived, if necessary.
It’s really odd seeing the Veggie Van with no front legs.

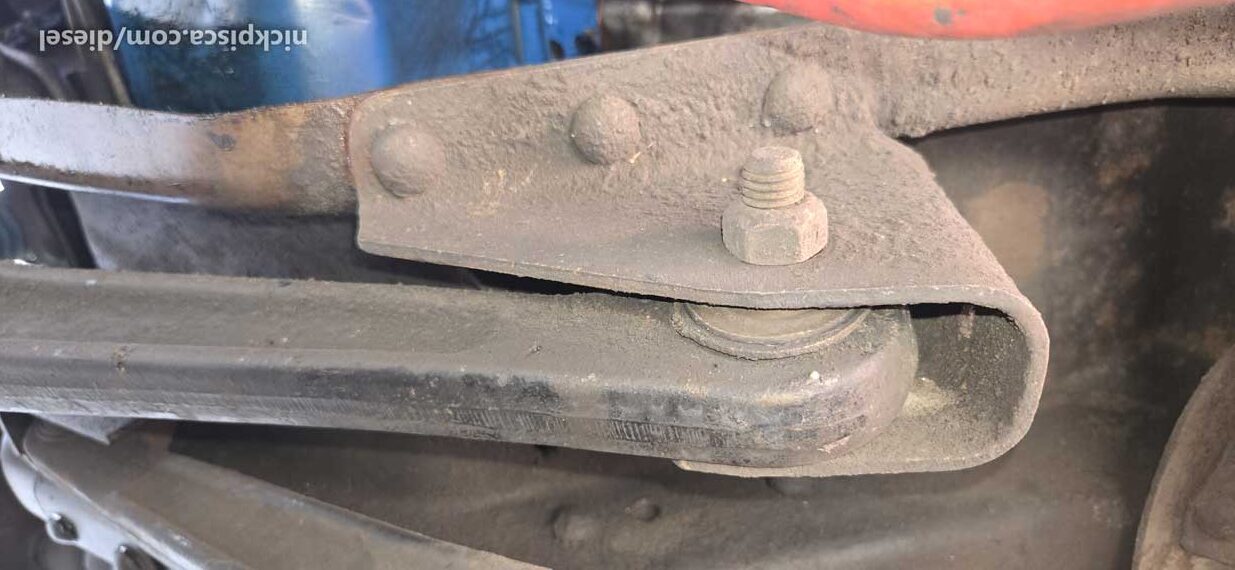
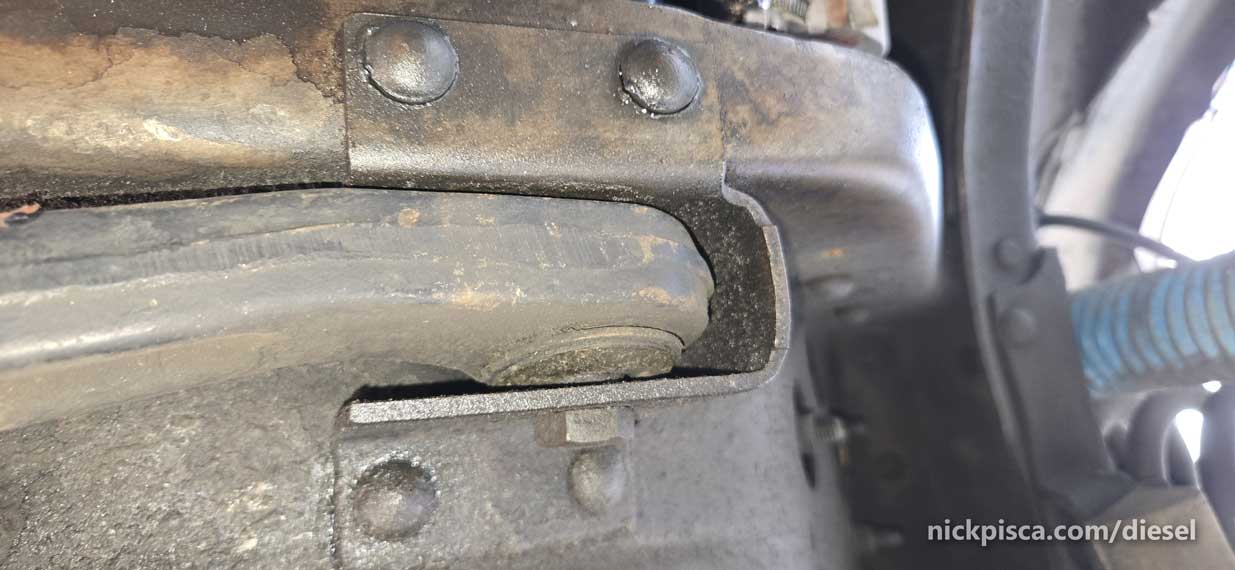
The rad arm brackets on the middle of the frame have to go.

The 4×4 front axle has its own rad arm brackets that mount further down the frame than the stock version.
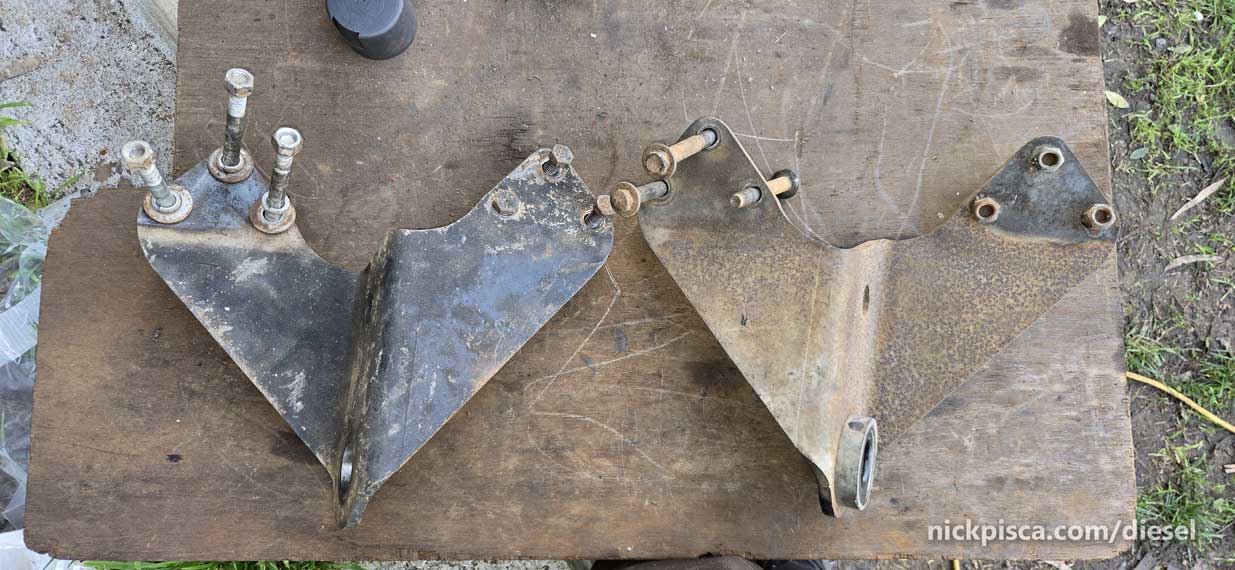
Well, the old rad arm brackets were mounted to the frame and under a film of grime and grease. I didn’t notice the nuts were WELDED to the old bracket. I used the impact gun on the nut side, and 2 of the 3 disconnected from the bracket. The third one stayed on for dear life, and that’s when I realized that I shouldn’t have torqued them off.
I cut one of the bolts off. The top one. There was the turbo down pipe in the way, and I would have had to remove the front seat, slide back the doghouse, disconnect the down pipes and up pipes, and slide it out of the way to remove one rusted bolt. I figured it was worth my time to cut it.
I started work on the cross member brackets as well. I’m still working on the demo and I’ll post more in the next few days.
Some major plans:
I’m using my new-to-me welder from Adam to practice to make some major modifications to the crossmember and bump stops.
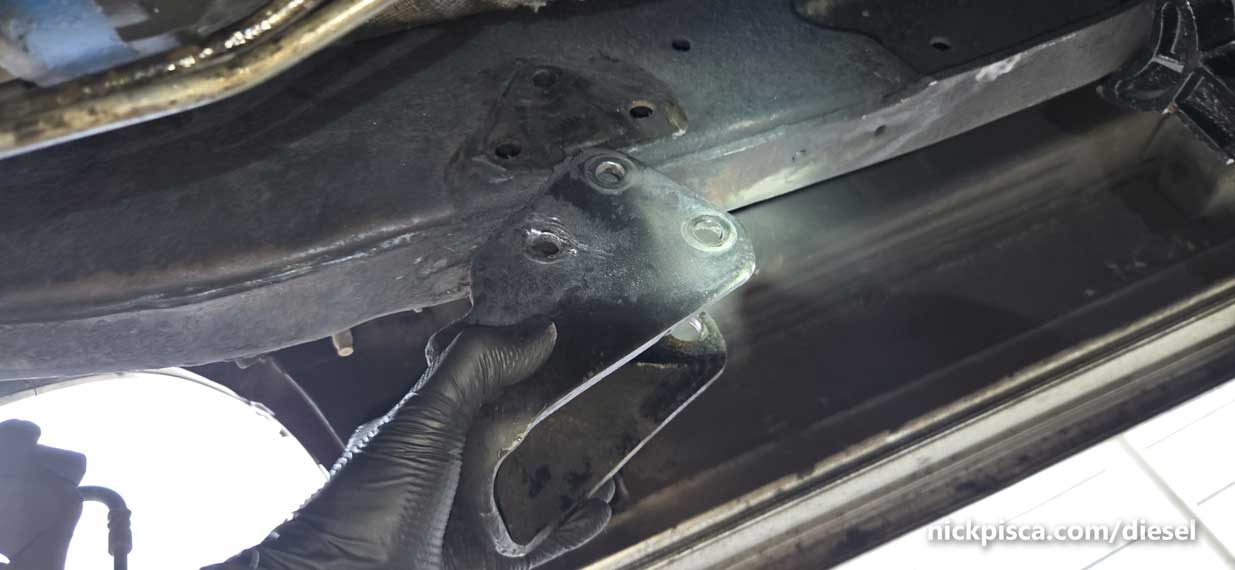
In the image below, from the infamous Boomer 4×4 conversion project, is where I’m working on next after the i-beam bracket rivets are ground off.
There are three red lines. The outside red lines are going to be my attempts to weld the bump stops to the underside of the frame. The middle red line is the cut I need to make from the crossmember, and weld a new steel channel to reinforce the cut.

The current bump stops look like this:
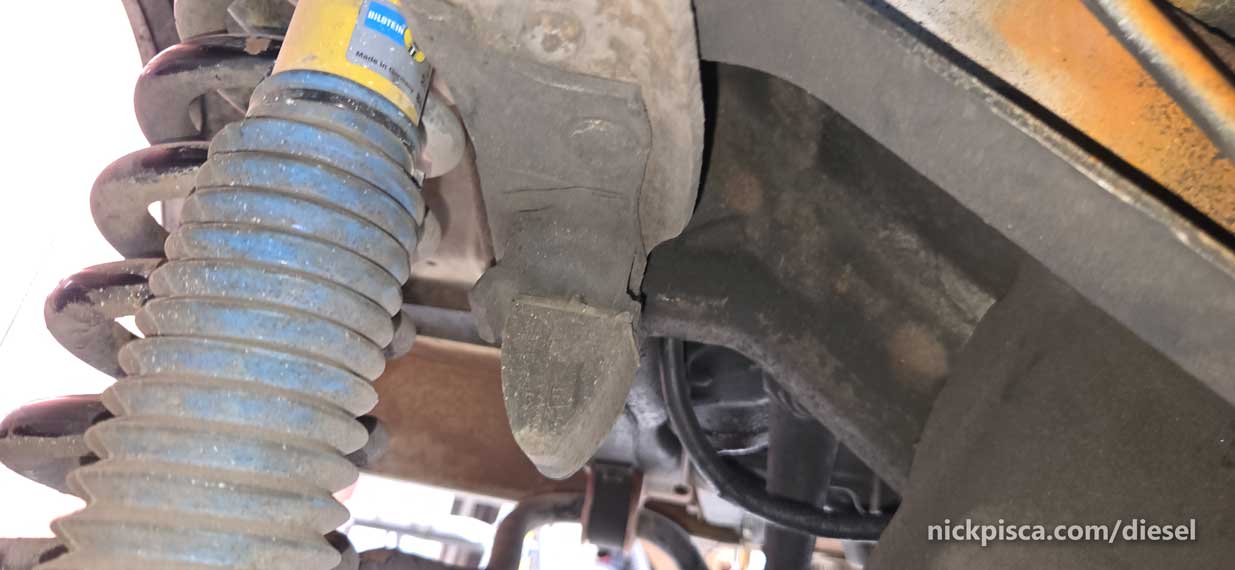
They need to drop a lot lower, like 2 or 3 inches lower, to prevent the Dana 44 axle from contacting the crossmember.

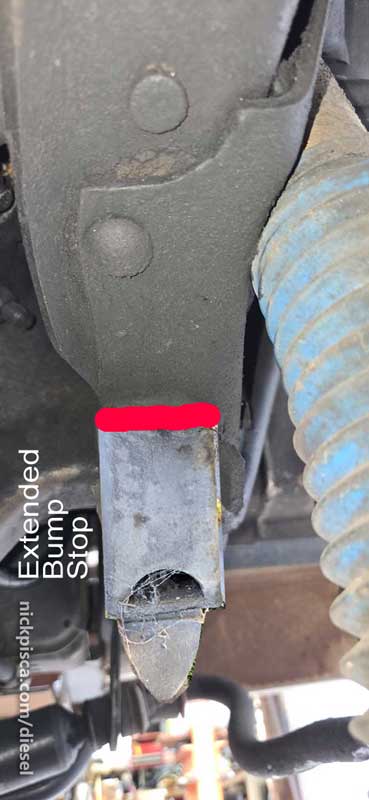
Ideally, it would look a little something like this:
Also, while I’m cutting away at the cross member, I’m going to try and avoid the impact point that Boomer encountered on his van conversion.
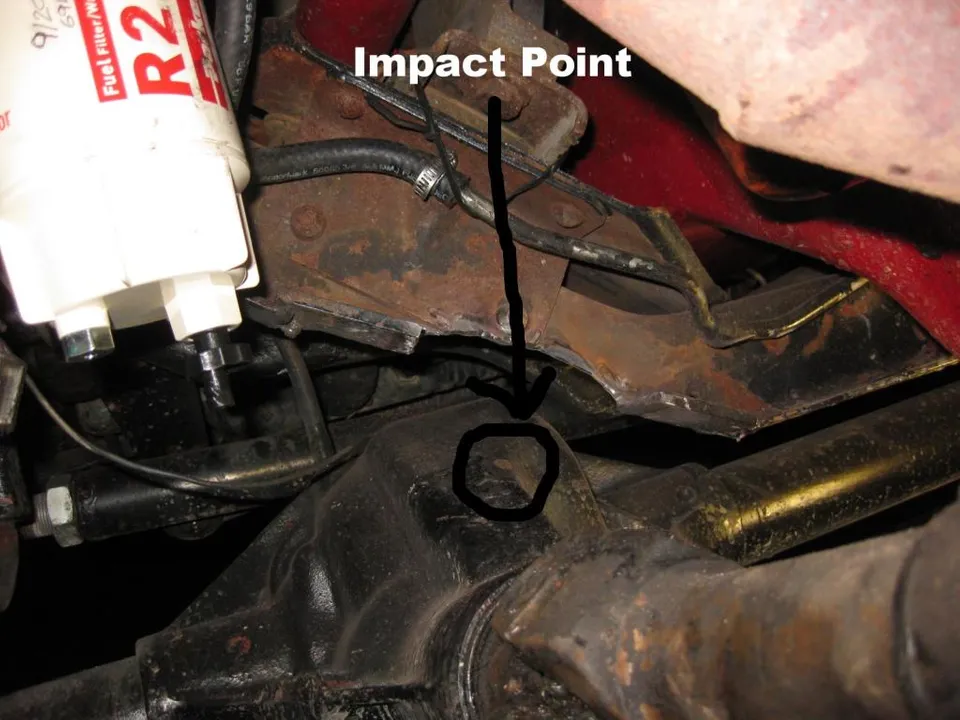
Copyright Boomer – User: spencyg https://forum.expeditionportal.com/members/spencyg.1533/
More to come. Read Part 2 here:
Tearing Down the Stock Econoline Front Drive System (Part 2)
