Let’s do a shorter article. While I had the axle disassembled, I wanted to replace every seal, bearing, and wearable part. Plus clean up this old axle, new primer, new paint, and the whole shabang.
If you want to see how I took the spindle off the knuckle, read this:
Dana 44 Knuckle Rebuild (Ball Joints, Shield Repair, Spindle Removal)
That was a huge PITA. That knuckle didn’t want to give up. As you can see, it was covered in rust, grime, and gunk.

The axle shaft seal (at the knuckle) was broken too.

The seal also had a plastic washer or spacer, to keep the spindle bearing in place.

Lastly, there is a small rubber seal that keeps the spindle bearing protected.

All of these seals and spacers are basically trash. I bet these are original to the 1979 donor F250.
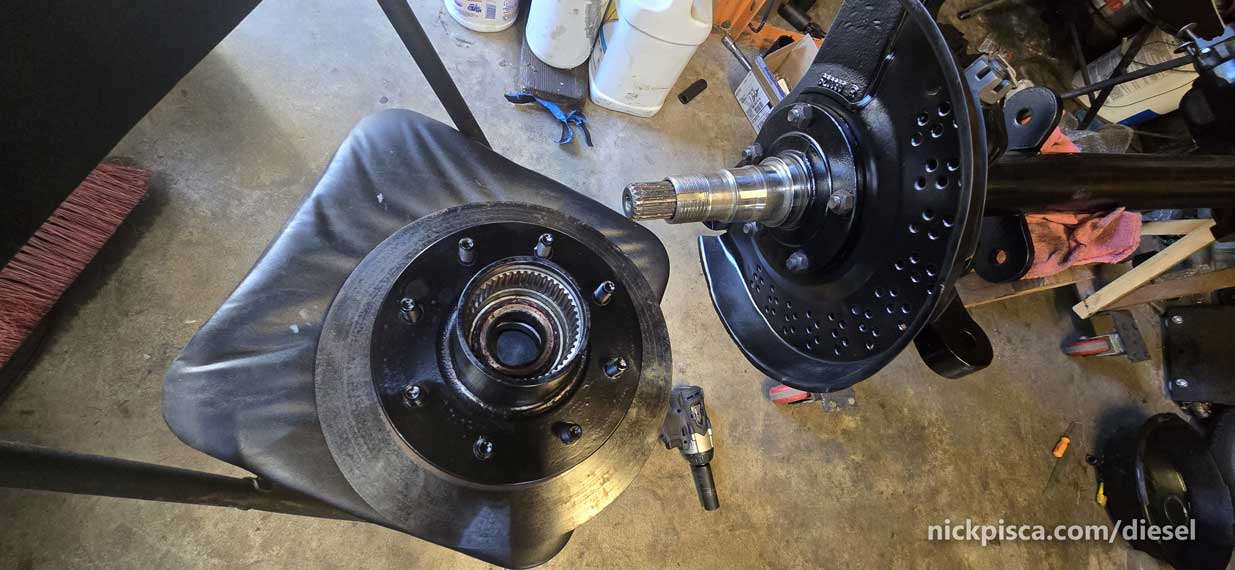
The previous images were from the passenger side spindle. Here’s the photo of the driver’s side. The seals on the drivers side are just as broken.

In the center, you can see the spindle bearing. It’s cylindrical (not conical, like the pinion bearings.). I need to get that bearing out, so I can fix this thing completely.
Info on the spindle axle shaft seal is: Porsheda V-ring V-57 Part No 38128 4406-17

I don’t have a slide hammer, so I figured I’d use an old washer on a threaded bolt to pry the spindle bearing out. This is a simple design. Just a standard bolt,nut, and washer that I ground down to fit inside the spindle behind the bearing.

Fail. Just bent the washer. That bearing is in the TIGHT.

Need an upgrade. Like upGRADE-8.
I”m adding this tool to my toolbox. It looks tight. Just a half Grade 8 washer (I think 5/8″ diameter hole), ground down the edges with a grinder, and drilled a 1/4″ hole for the bolt. Perfect fit.

New washer with a stronger steel did the trick:

Using a simple socket wrench, I was able to pry up the bearing out of the race.
WRONG. WRONG.

The only reason why the bearing came out, was I used a hammer and a long bar from the backside to pound the washer a millimeter, then used the socket wrench to pull up every millimeter. Took a while.

Finally.
So, I bought a new sprindle bearing kit. It came with everything but the washer, so I had to reuse that plastic spacer from before. Thankfully, it was the least damaged part from before.
I cleaned up the spindle, primed it, and painted it on the painted sides. This was for a couple purposes: 1.) keep it from rusting more, 2.) looks nicer, and 3.) MAYBE IT”LL NOT FUSE TO KNUCKLE AGAIN.

Here’s the rebuild kit I used: (I didn’t use their spindle bearing, and I’ll explain why.)

Time to install the new spindle bearing:

NOT. That’s actually the old spindle bearing. I looked at the “new” on and it had a bunch of flimsy plastic in it. The old bearing still looked good, so I cleaned it out as much as possible. Then I used brand new Mobil 1 Synthetic red grease to make it good as new.
Since it takes a 20-ton press to put in this tiny bearing (THAT’S CRAZY), I smooshed her back in.

I added the small spindle bearing seal into that groove inside the race.

I gooped the inside of the housing with more Mobil Grease. When I press this back into the knuckle, I don’t want it fusing with rust again.
Here’s the new seal on the axle side:


As for the axle shaft seal, I added them to the respective axles instead of them being fused to the spindle housing.
Guess what I forgot to do? Put the darn spacer on. So I put the spindle on the knuckle with my impact driver, and then I had to punch it off again a second time to do that all over again. LOL.

Looking GOOD.
Now it’s time for the Rotor rebuild. Stay tuned