
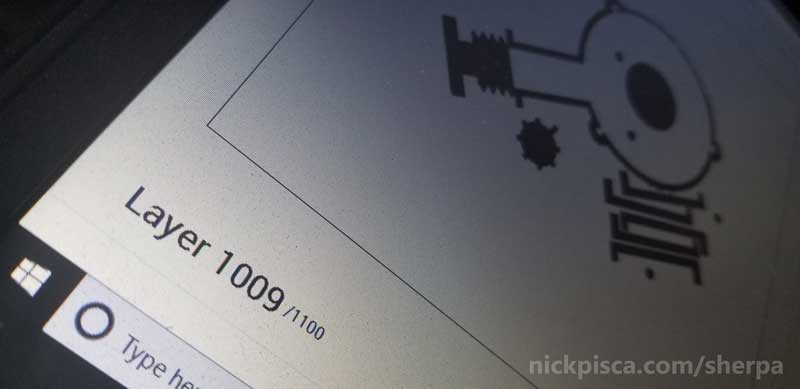
This is really cool. We calibrated our kit to the point now were we can reliably get large builds. After a bunch of calibration prints and lots of smaller models, we finally crossed the 1000-layer threshold!
We attribute this success to the temp calibration process we set up and also using our Maya MEL exporter, but a lot of it is the guidance given to us from 3D Chimera. I highly doubt I would be this adept at SLS Printing if it wasn’t for their help.
I sincerely think we get better sintering for large builds because of the Maya MEL exporter. It allows the galvo to sinter each STL individually, instead of scanning the full footprint of a combined STL. That saves a buttload of time, which always makes me leery that some curling will occur if the layer takes too long.
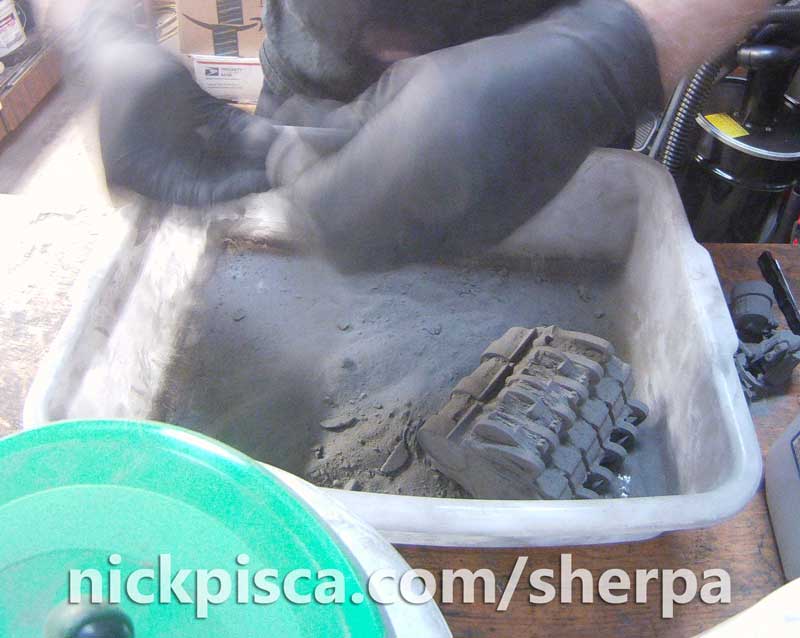
I pulled the geometry from the bed and started brushing off the excess. I’ve been able to reuse most of my powder, probably only wasting about 5 or 10 percent.
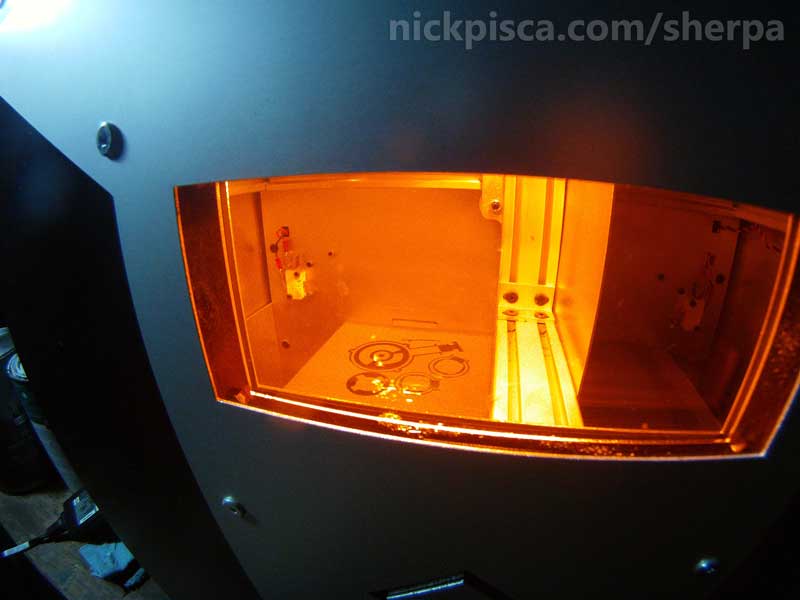
I had something like 125 STL’s in this job, so it was PACKED. Thankfully, due to my temp calibration system, I’ve found my temperature sweet spot: 173.8 deg C. This allows for the largest sinterable footprint while not fusing the powder into a brick in the center. YES!
Just check out all the parts I got out of just one job:
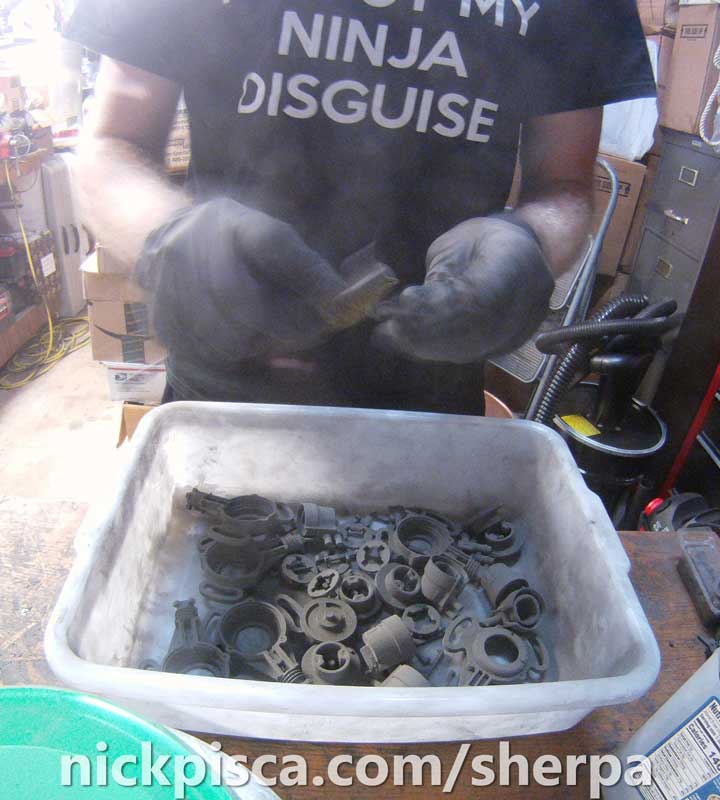
The powder sticks to the outside of the print, so you have to caress it with a wire brush and vibrating toothbrush. Also, for all my interconnected parts, I just snap them all together and work them a bit, to ensure that all the rotating elements don’t hang up on something. Here are some of the assembled units:

Enough pictures! Get to the video already!
Check it out:
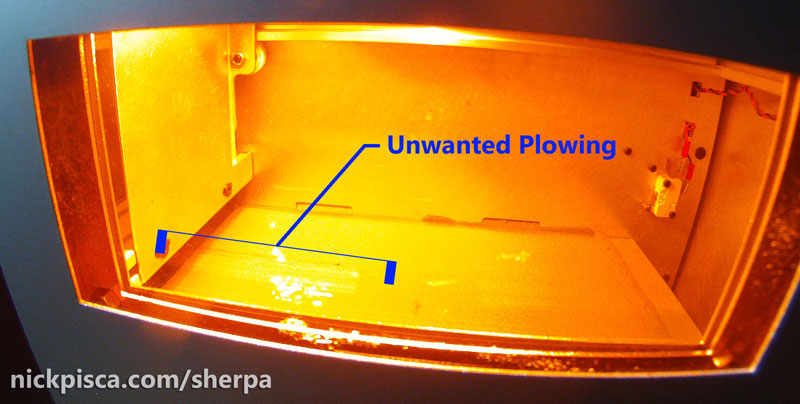
In the video, I mentioned that in my timelapse, I saw a part of a cap that peeled from the surface and plowed across the whole build. By some miracle, it didn’t ruin the whole project.

The applicator fin moved the offending goo to the overflow bin, and for the remaining 970 layers, everything sintered fine. Maybe on a layer of some of the elements, there might be a line showing this plow path, but I never noticed it. It would constitute only a 0.2mm error, so you’d have to know it was there to even notice it.
I’m 99% this was an issue dealing with the way that I fill my beds before I warm up the kit. Sintratec recommends that you use a 70-30 mixture of new-and-old powder, however, I have some “overused” powder that is kind of useless. I wanted to find a use for that stuff, because it’s expensive.
Also, Sintratec wants you to fill the left-side tray with a 5-9mm layer of powder, so that the new geometry has a bed of powder to lay in. This stuff never gets sintered, so I figure, this would be the place to reuse this crappy powder. In addition, the top 26 layers of the right side tray gets dragged over to the left side as well, in the “powder preparation” process prior to sintering. That constitutes a lot of powder that never gets sintered. So, whenever I fill my beds, I use new or 70-30 mix in my right bed for 90% of the build, but I use 100% old powder on the left bed and the top 20 layers of the right bed.
For the most part, it works fine. No sense in wasting good new powder in these areas that don’t get sintered. However, I think because my plowing issue didn’t occur on the rest of the build, that must mean that my first few layers of powder had an issue. I figure I must have put a few too many layers of old powder on the right tray. I’ll be sure to put a bit less of the old powder on the top in the future.
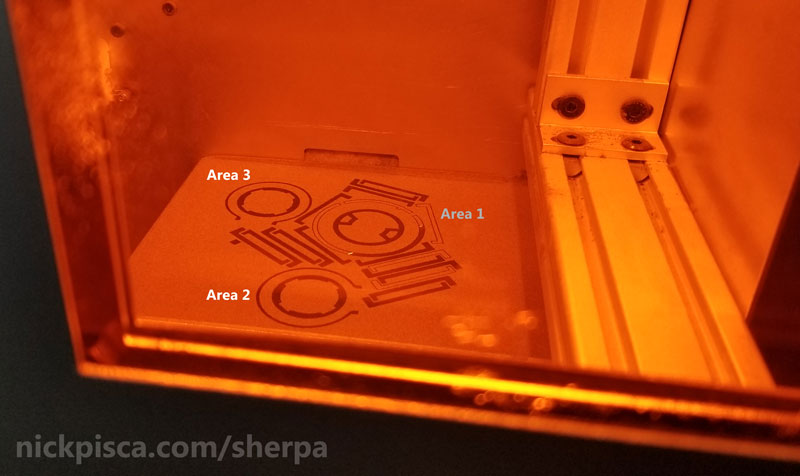
Also, on the next job (which got up to 1068 layers!) I moved my thin geometry to the left side of Sintratec Central, so that if the delamination ever occurs, the fin will just plow the geometry off into the overflow, instead of dragging across all my good parts.
In the image below, “Area 1” was the previous location, and I placed the caps in the 2nd and 3rd areas instead. These had historically better sintering as well, so it’s just saver. Also, this orientation allowed for even more STL’s in the same volume, with something like 130-some files in one job.
This is really cool.
The next article will detail some of the modifications and fixes I made to enhance the performance of my kit even more, notably a stepper coupler fix, maximizing your z-height capacity to get even more layers, and fixing my galvos to get smoother geometry.
Also, my 1068-layer model used a new laser path setup, and I’ll detail how I was able to sinter 100% old powder without major curling. If I can perfect this, that could mean that I should have negligible powder waste. HUGE!!!!


![[0001D] | How “Mega-Dots!” Puzzles Got Started](https://www.nickpisca.com/sherpa/wp-content/uploads/2015/06/PA218118_Generic.jpg)
Recent Comments