

Assembling a Sintratec Kit can take a few days and it’s a rather complicated process. Here are the videos we made of how we assembled our unit and got it calibrated for 3D printing.
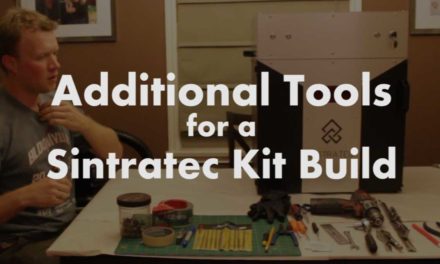
The process contains several steps: Door, Base, Core, Lamp, Hat, and Electronics. There is also an additional step that is tangentially related to the assembly, called the Initial Commissioning. Each step takes about a half day to complete, and Sintratec expects the average assembler to allocate approximately four full work days to the assembly process. That’s a pretty conservative estimate unless you have some experience tinkering on things. This project required a lot of room to lay out all the parts, some decent experience with electronics and mechanics, and if you want the job to go faster, some additional tools that are not provided with the kit:
The assembly videos will be listed below. They are a bit long, because we didn’t want to edit out all the complicated or confusing bits from the shot. If we encountered something that didn’t make sense or didn’t fit together, it’s in the video so you can learn from how we resolved that issue.
The first part of the assembly project is making the door. Seems like a simple task, but the door has a lot going on. Two layers of protective glass, a layer of laser-glass, various types of aluminum sheeting, thermal insulation, and other components. It’s a great way to start off the build, because if you can’t handle making the door, you probably shouldn’t move on to the rest of the assembly. (3D Chimera will offer to assemble your kit for you, for a fee).
Check out the door video:
The second major step in the process of making a Sintratec Kit, is the base. The base is basically a box filled with insulation to act as an oven for the printer volume. Since sintering requires 300+ degree ambient temperatures, you need a good solid base with effective insulation to protect against heat loss and burns.
Check out the Base Assembly video here:
The lengthiest part of the entire project is assembling the “Core.” The Core contains the moving parts of the build (like the applicator fin, pulleys, elevators, etc), as well as the volumes for the supply-, build-, and overflow-bins. It resides in the Case (shown above) and is removable for maintenance, if necessary.
The core assembly videos will be broken up into chapters. Part One of the Sintratec Kit Core assembly is located here:
Part 2 of the Core:
Part 3 (final part) of the Core build:
The wiring is starting to get hectic. I’ll post more videos of the Lamp and Hat construction soon.
Part 2 of the Hat: Check this out!
Next up… The electronics portion of the show. Hope you brought your wire cutters. Cut the blue cord.
As a bonus for visiting our website, we’ve included our Initial Commissioning process in this series. Technically, the machine isn’t entirely assembled at the end of the “assembly” sequence, because in the Initial Commissioning stage, you still have to adjust the galvos, boards, lenses, and other components. You still need to install the laser box, laser fan, and lastly, bolt on the top plate of the machine. Wear LASER EYE PROTECTION!
As you can see from the various articles on this website dealing with our Sintratec SLS Printer, our kit is working well. We’ve been using it regularly for a year and it’s been a trooper. We’ve even made some software and hardware modifications to allow for faster printing and use of 100% old powder. Check out the other articles to see our progress.
Lastly, if you are strapped for time and can’t watch all the great assembly videos, check out this additional time lapse of the entire Sintratec Kit Assembly which compressed all four days into a short fifteen minute clip:


Recent Comments