
After a bunch of test prints, and a couple aborted prints (due to rough calibration or galvo issues), we finally got a successful bunch of models generated by our Sintratec Kit. Very exciting.
Sintratec and 3D Chimera both recommend using up as much of the volume as possible, because why not. The more models you jam into the space, the better. So, a while back, I bit off more than I could chew and tried to print a 11cm x 11cm x 11cm full bed of parts. Ha! I really didn’t know what I was getting into back then, and now in hindsight, I would NOT recommend a newcomer to Sintratec to attempt such an audacious volume right off the bat.
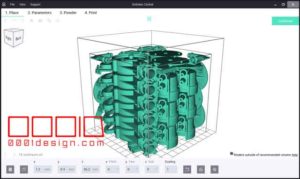
Screen capture of my theoretically possible STL combination inside a 11cm x 11cm x 11cm cube. The corners ended up curling due to uneven temps, the job was aborted before there was catastrophic carnage.
Instead, I narrowed my focus, refined my laser speed and bed temps until I got some consistent results. Also, I increased my bed margins 1cm on each side, resulting in a 9cm x 9cm x 3cm design volume. I used my spiffy Maya MEL custom tools to nest the geometry and export the content into Sintratec Central without needing to use their auto-nesting utility, which provides vastly larger spaces between all the elements. Their tool would be nice if you were in a hurry to get this done, but I have plenty of time to situate all my models into a tighter space, in some cases providing only a 1mm gap between the geometry.
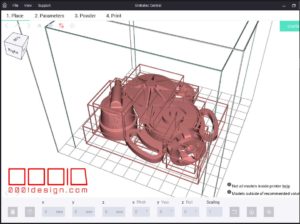
Smaller volume attempt. Successfully printed with flying colors. Approximately 40 STL files were nested together in this one bed.
Then I used my custom exporter to get the geometry into Sintratec Central without it being one gigantic STL file:
[Video] Figuring out an STL Export/Import Workflow from Maya to Sintratec Central
The printing process went well, and I supervised the first dozen layers to ensure that no curling would occur and ruin the entire print. Thankfully, I avoided the corners and the far edges, which are typical areas for issues. In a future article, I’m going to detail a special bed calibration method I have been using to identify areas of the sintering issues.
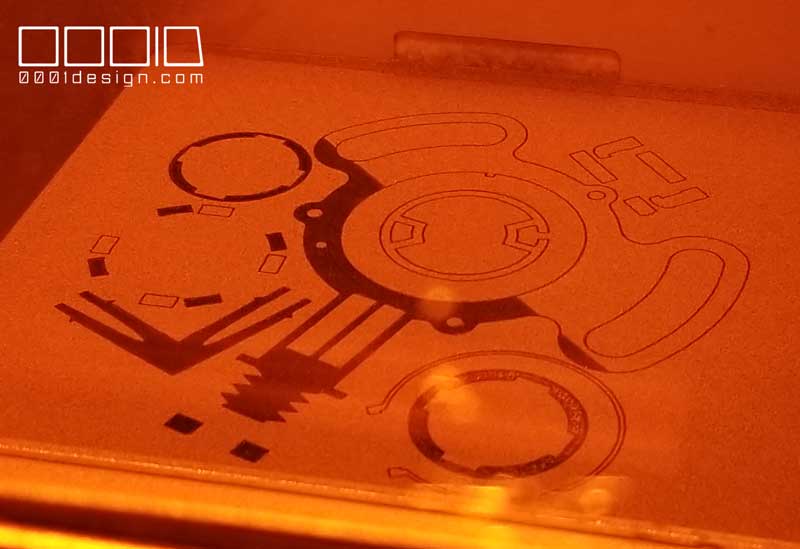
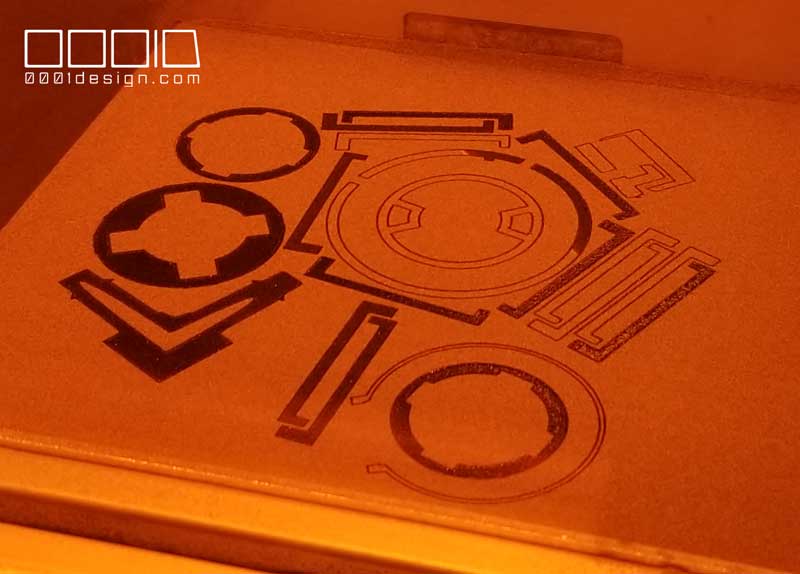
The sintered hatches worked out very tight and has some outstanding resolution. Also, you can see a nice dark hatch, which wasn’t like that when I had the galvo loosening issue. Maybe the focus of the laser was off or something, but the current status of the laser is spot on.
Also, I used a 70-30 mix of new powder and old, with bed temps at 172.2 deg C to improve my sintering on the outer edges. Everything inside the 9cm square was far enough away from the edges to ensure I wouldn’t get into curling areas, so I felt confident to let the print run all night.
After running from about midnight to 1:30am for “warm up,” it started sintering around 2am and continued well into the night. I checked on the machine around 7:30am and it had stopped sintering, but the cool down process had just started. At around 11am, I waited until the entire machine had completely cooled off, because as the tech genius at 3D Chimera recommended, don’t pull your models out until it’s fully cool. Even though Sintratec Central says it’s in “idle,” that doesn’t mean the inside of the powder isn’t retaining heat.
Here’s the immediate aftermath of the clump of parts that I excavated from the bed:
In the video, I’m pretty gingerly with these things. I didn’t really know what to expect in terms of material strength or resilience. Turns out I didn’t need to be so careful. The PA12 powder with the sintering process really makes these parts durable. In the future, unless I have a suspicion that they didn’t print well, I’m going to tear down these parts a lot faster.
I couldn’t be happier with these prints. I’m going to keep pushing more and more models and see if I can do a deeper print of a similar setup. I’d like to get at least 6 or 7 of the entire unit and all its parts into one bed at a time, so I can make about 50 of these in a weeks worth of sintering overnight. Once I have a viable STEC layout, I can always just load up the model, fill up the bed, preheat the oven, and leave it run all night, assuming I have all the calibration fine tuned.
Ultimately, I’m going to do some test printing of the entire bed to find any potential problem areas from the laser or temperature fluctuations. I’ll post that information once it’s completed and edited.


![[0001D] Automated Mega-Dots Tag and Leader Optimization](https://www.nickpisca.com/sherpa/wp-content/uploads/2015/09/20151112_XMLCTDImporter13.jpg)
thanks for sharing this info. it helps alot as I recently discovered this machine and want to get one as I spend $1000’s with Zelta3D on 3d sls printing but want to start doing my own. I couldn’t find anywhy the process of removing and separating and this helps heaps. Can you give me a link on the story of increasing your build area? also are you still using these or have you upgraded?
cheers Jady (Australia)