This article will detail the replacement of the center-tank sender on a Diesel IDI Ford Van.
If you have a 1980’s Ford diesel van, you probably have a faulty fuel gauge. There are many reasons why this may occur:
1.) Your sending unit has failed.
2.) Your float has a hole and is full of fuel, thus reducing its buoyancy.
3.) Your gauge is faulty.
4.) Your wiring is shot.
Most of these old diesel vans have two tanks. They do not have interchangeable parts. The Center Tank has a different sender and pickup than the Rear Tank. Also, the Diesel Ford Tanks have different senders and fuel pickups than the Gasoline Ford Tanks. So, before you make assumptions, you should thoroughly research your tanks prior to purchasing random parts.
Unlike my previous article about the rear tank, this article will detail how to replace the Center Tank Sender with a “New-Old-Stock” (N.O.S.) unit. The previous article, which shows how to modify a 460 gasser sender to work on a diesel rear van tank, was a workaround I read about because as far as I know, no one sells the rear van senders anymore. Fortunately, there still exist intermittent sales of the Center Tank Senders on Ebay at the online store “stilwellsobsolete.” Even though they are over a hundred dollars, I consider it to be a rather reasonable price to have a reliable tank gauge and not have to spend an afternoon modifying an alternative gasser sender.
The IDI Ford Van Center Tank Fuel Sender part number is E9UZ-9275-A FUEL SENDER W/O 094954. S5 070391.
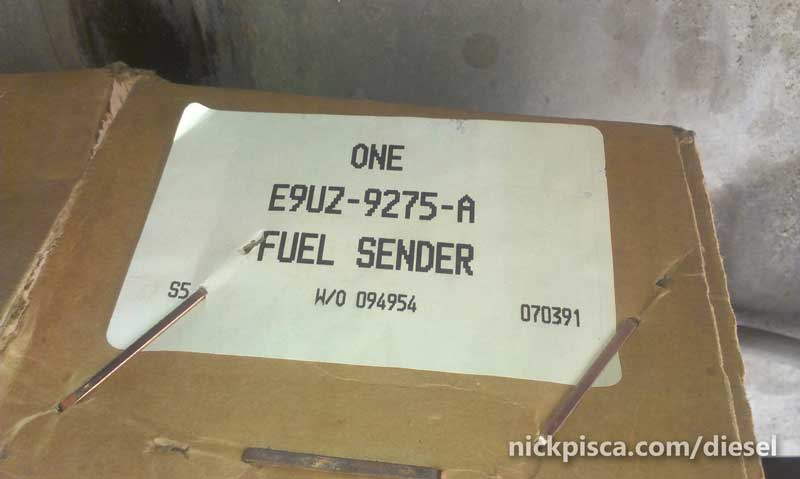
It should be noted in advance that this part wasn’t a perfect replacement. There were some minor differences, but thankfully, it didn’t appear to impact the installation of the device. There is a photo below in the process that shows the comparison.
DISCLAIMER: Diesel IDI and its authors are not responsible for anything, for anyone, for anything you do or indirectly do to yourself or anyone or anything. By reading this, you accept all responsibility for everything.
Installation Process.
Since the tank sender is located on the top of the fuel tank, you must drop the tank to access it. Maybe in trucks, you can pull the truck beg and get access, but in these IDI vans, you don’t have an access hatch through the floor boards to work on it. So, start the day with lubricating your mounting bolts, brush shield bolts and horizontal member bolts. It is likely these bolts will be severely rusted since they are located on the underside of the vehicle.
While you are letting your bolts soak with penetrating oil, this would be a good time to siphon out the existing fuel in the tank. DO NOT attempt to drop a full or partially full tank. Since a gallon of fuel is about 8 lbs, a full tank including the weight of the metal, can be as much as 150 lbs. There are multiple ways to siphon the fuel, either with an expensive fuel pump, or inexpensive hand pump. The tricky part is getting the hose down to the bottom of the tank; you may have to spend several minutes trying to get the hose passed the metal lip on the top of the tank where it connects to the rubber fuel nozzle hose. While it is not recommended, in an emergency, one could siphon the tank with a hose and suck on the end of the hose, to create a flow to a vessel at a lower point than the fuel cell.
However you do it, the simplest way to empty a tank is to run it near dry prior to this installation process. However, as many of us IDI owners already know, the infamous “Cone of Failure” at the end of the fuel pickup may have broken off in your tank, which means you cannot run that last 1/4 tank dry because it doesn’t reach far enough into the fuel level.
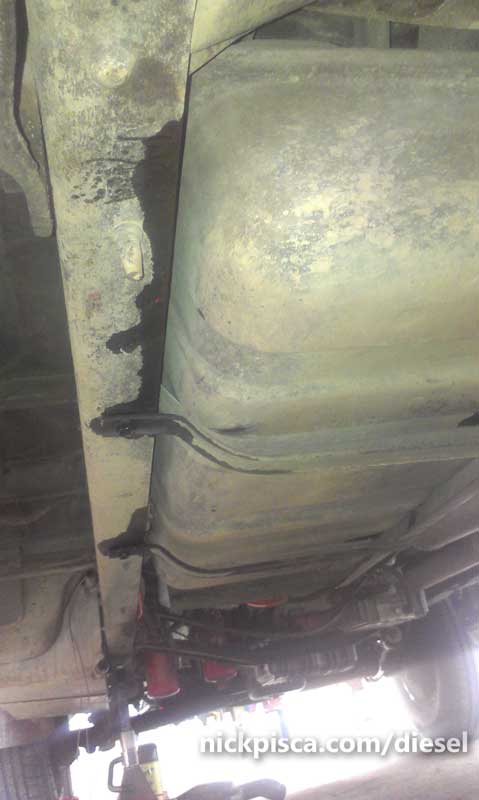
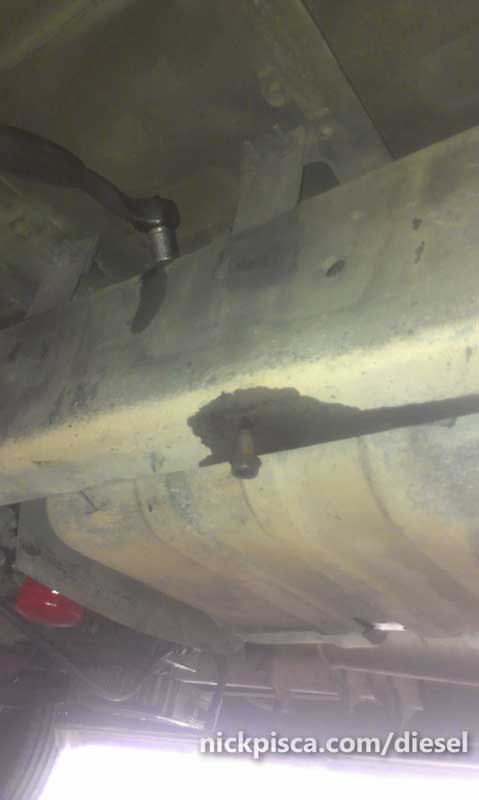
The tank is protected by two horizontal members connected to a curved sheet metal shield. You must remove that apparatus first to get access to the tank system.
Undo the bolts on the frame and crossmembers, and drop the shield.
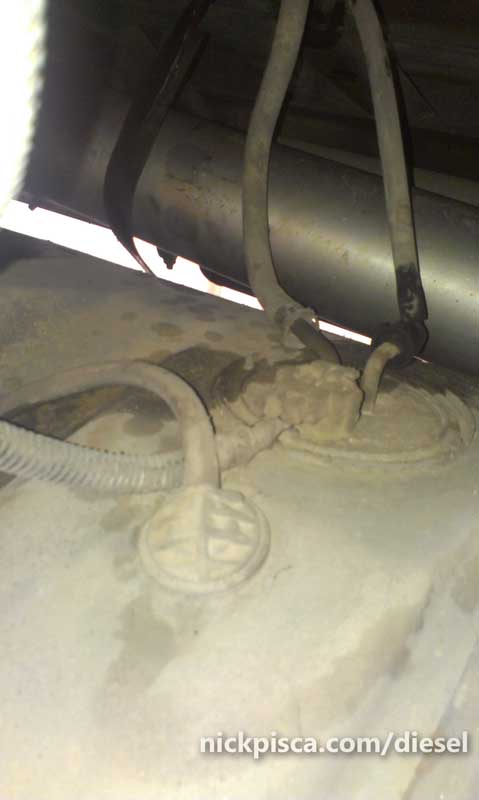
NOTE! Do not just start dropping the tank. FIRST, make sure to disconnect your fuel nozzle hoses. If you drop the tank first, it will be exceedingly difficult to undo the hose clamps while simultaneously holding the tank up. Also, depending on the condition of your fuel nozzle hoses (which could be really brittle), having all the weight of the tank on those nozzle hoses could result in the hose cracking or the metal tank ports being damaged.
From the rear side of the center tank, you should see the fuel nozzle hoses and their clamps. Start to loosen them up. If these haven’t been replaced since the factory, they will likely be oriented in the worst possible way, because the van shell probably hadn’t been installed when the man on the line put the hose clamps on the tank. If they are oriented toward the front of the van, get a small 1/4″ drive socket wrench and undo it a wiggle at a time.

There may be a scenario where you will have to partially drop the tank to get access to the hose clamps. If that is the case, use the procedure below to drop the tank, and have it rest on blocks or something to keep if from straining the hose nozzles.
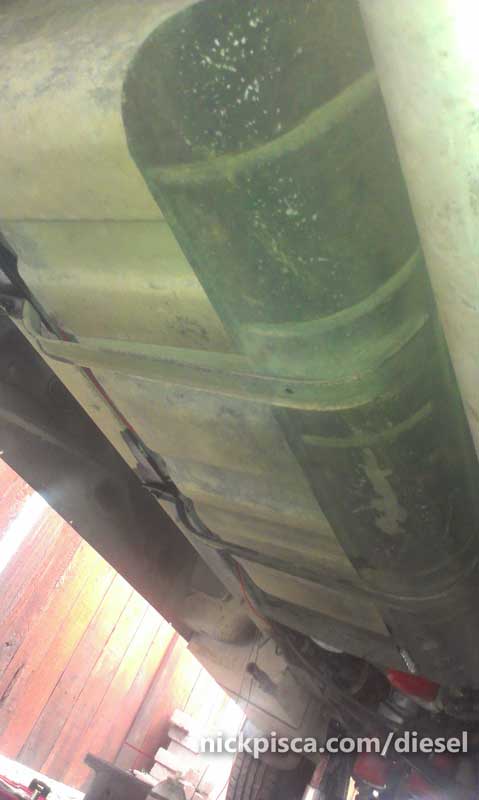
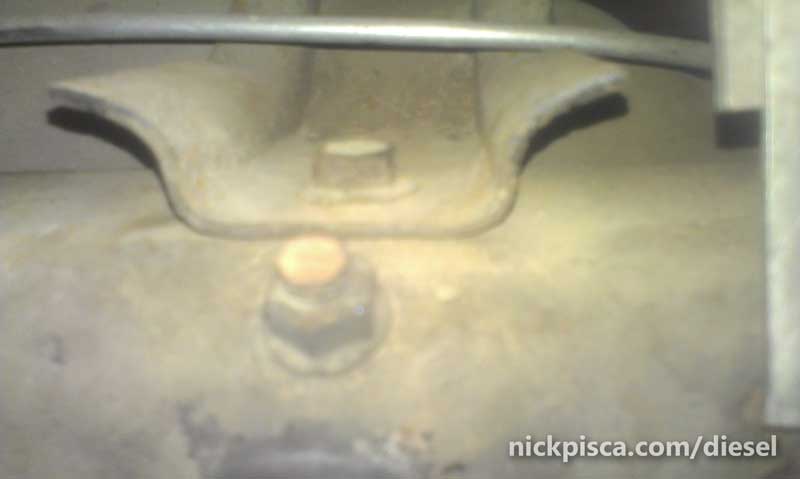
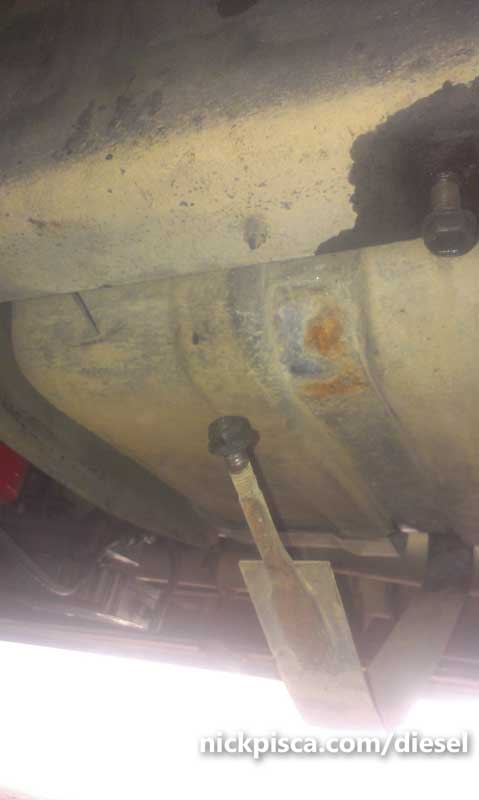
The tank straps are secured with a slot connection on the interior, and a nut-and-threaded-rod connection on the exterior. From the top of the frame, start undoing the nut. You may need a deepwell or pass-thru socket set, depending on how deep the tank is.
Here’s a picture of the nut and threaded rod on the top of the frame:
Once you have both straps down, they should hang down like this:
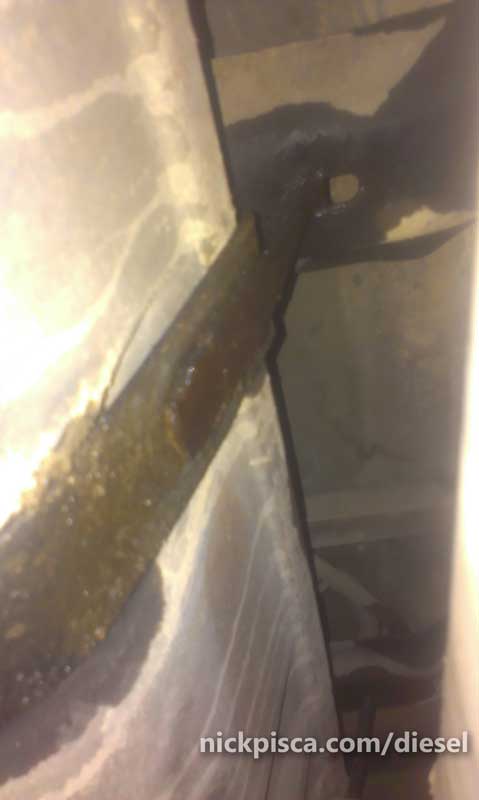
Here is a picture of the tank strap slot. Once you get the straps unbolted, you can turn the strap 90 degrees, and it will allow you to pull the strap through the slot.
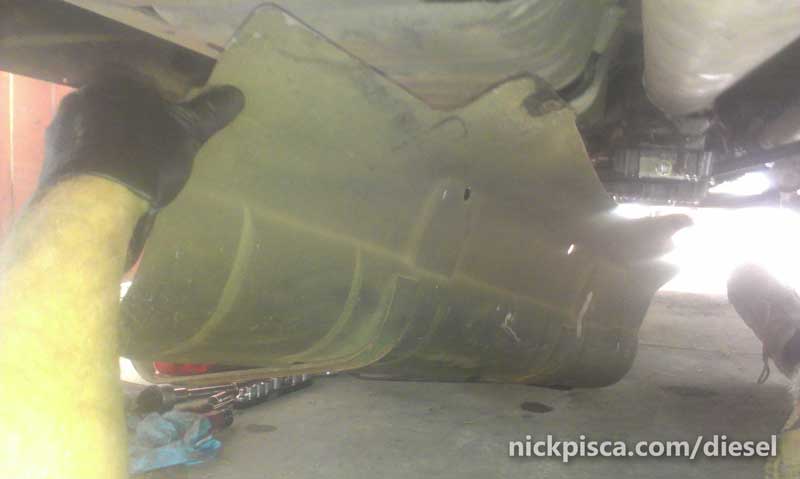
If the tank doesn’t already fall down, give it a tap with a rubber mallet. It should come down easy, but sometimes rust and mud and gunk can make it stick to the underside of the floor board assembly.
Carefully rest it on the ground or on blocks, and be careful not to kink or strain the fuel pickup wires and hoses.

The fuel sender unit has two components: wiring and fuel hoses. The hoses have lock rings that you take out by the side of the hose. Once out, then the hose slides off the hose bib. The electrical clip has a locking latch that you can theoretically bend back to let it slide off the connectors, but your plastic is likely super brittle from decades of driving. Regardless, try your best to pull the connector off without breaking it.
Once disconnected, slide the tank out of underneath the van. Depending on the tires and suspension on your van, you may need to jack your vehicle up on jack stands. My van sits quite high, so I can pull the tank out without jacking it up. If you jack up your vehicle, do it carefully and follow all standard jacking rules and safety protocol. We are not responsible if you kill or maim yourself by jacking your car up incorrectly.

The new sender will come with a big round gasket seal. Also, it will have the supply and return line bibs capped. Leave these caps on until it is time to reinstall your fuel hoses, because they will keep your fuel lines clean from potential dirt and grime.

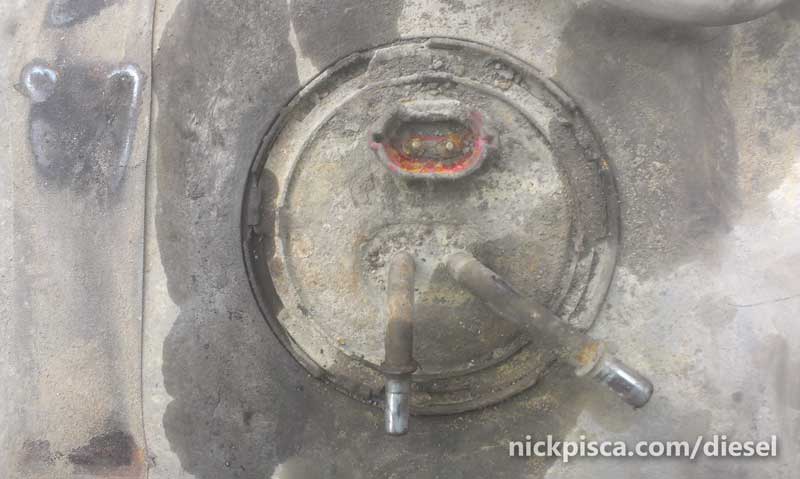
Clean off the top of the old fuel sender unit from the tank. It will likely be covered in dirt and grime, so carefully clean the top. Using a screwdriver or strong piece of steel, try to “unscrew” the large round ring by tapping the retention ring in a way so that it will unscrew counter-clockwise. Be extremely careful when tapping. If you use a hammer, you might just break off the retention ring tabs instead of spin it counter-clockwise. It might be prudent to let this ring soak in penetrating oil for hours or days, if you have the time. NOTE: The retention ring is not the outer-most tabs of metal, but rather the second-outer-most tabs. If you tap on the outermost tabs, you might wreck the tank itself.
Once the retention ring is gone, carefully pull the unit out of the tank. It may require some finagling to extract, because there are some moving parts. Even if it looks impossible, there is a way to get it out without forcing it.
If you have never replaced the fuel pickup, there is a 99.9% chance your “Cone of Failure” is likely broken off in the tank. While you got the tank out, it would be a great time to inspect the inside, find any loose items or parts, and clean the tank out professionally. Call a local shop to have the tank cleaned and/or boiled. DO NOT wash out the tank with water, unless you can invest the time to ensure the inside will be completely dry when reinstallation can occur.
Here are the two senders side-by-side:
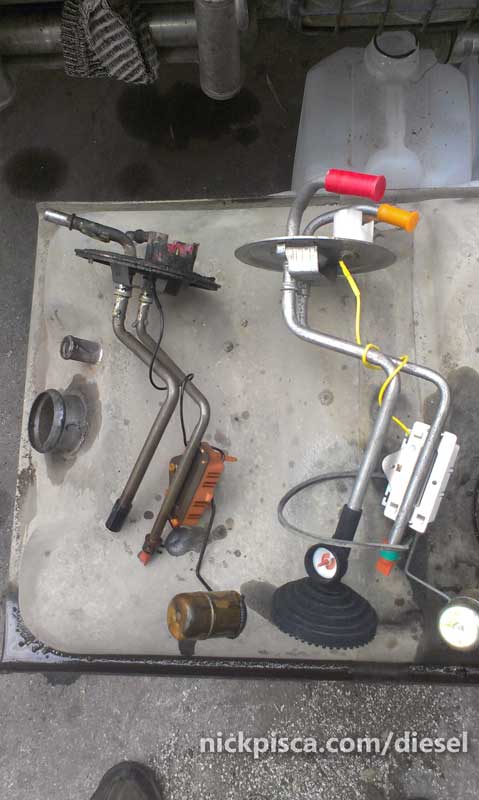
As you can see, my old sender’s Cone of Failure is broken off. I found it in the tank. Also, my brass float had diesel sloshing in it. This resulted in reduced buoyancy and faulty fuel level readings on my tank. Also, the resistor was severely worn in the unit. Nearly everything on the old unit was malfunctioning, so this is a long-overdue replacement part.
There was only one difference from my stock unit and the new sender unit: the hose orientation. If you look at the hose bibs on the top of the sender units, you can see the new unit is 180 degrees from where it is supposed to be. This isn’t much of a problem, but you have to spend a few minutes splicing in a few feet of diesel-rated fuel hose to extend the fuel hose. Maybe your fuel hose has enough of an umbilical to reach the new orientation, but if not, just do as I did and splice in some extra fuel hose and clamps.
Clean up the tank hole and edges as good as possible. You want to have clean metal into which to insert the new unit. Also, the gasket o-ring needs a clean surface to ensure no leaks. Once clean, coat a fine layer of anti-seize all over the tank and edges of the sender plate. This will help prevent the tank from rusting permanently to the new sender in the future, and it will lubricate the new gasket o-ring to make it slightly more pliable.
Slide the new o-ring gasket over the guts of the new sender unit. Carefully weasel the new sender unit into the properly lubricated and gasketed tank hole. Make sure your gasket rests nicely in the groove of the tank hole. Orient the new sender so that it fits with the Cone-of-Failure toward the middle of the tank. There really is only one way to install this, so do your best to install it without FORCING it. Once oriented properly, lubricate the top sender edges with anti-seize compound, and place the lubricated retention ring on the top. Carefully tap the retention ring in a clock-wise fashion until it locks the sender unit into place.
Reinstallation is the reverse process of dropping the tank, listed above. Just remember that the supply hose is slightly larger diameter hose than the return hose. If you swap the two, one will feel too big and the other will feel too small. Also, when you reconnect the electrical connector, it is prudent to apply dipole grease to protect and preserve the plastic and metal.
Hindsight Comments:
Perhaps considering the Cone-of-Failure’s track record for failure, I probably should have just broken it off from the start. That’s up to you. If you break it prior to installation, you can secure a small section of hose (much like in my tutorial for the Rear Van IDI Diesel Tank Sender) to dip down to the bottom of the tank, without the nagging feeling of the Cone’s impending malfunction somewhere down the road. I’m just going to continue to leave it as is, even though it might have been prudent to do this in advance.
Overall, I am thrilled to have functioning Center- and Rear-Tank gauges again. running these IDI’s dry are a huge pain to get started again (often requiring cracking injector lines) so having functioning fuel gauges are imperative for reliable travel.
For the Rear Tank Sender Tutorial and 460-sender conversion article, visit:
No warranty. You are responsible for your vehicle. For novelty use only. Not responsible for anything or anyone. Not responsible for damage to your vehicle, you, or anyone or anything.
Copyright 2000-2018 Nick Pisca 0001D LLC
