Several years ago, Andreas Johansson did a DIY installation of the massive 44-gallon fuel tank in his shortbed 1999 Ford F-350 PSD. He made a write-up of his project, and it should have got more attention than it did. It’s an impressive install with modified crossmembers and custom structural supports. Also, he converted the tank for VO, complete with hotfox integration and other electrical tricks. He saved the document on Dropbox, and went about his business.
Sadly, over the years, Dropbox changed its links and the inspiring conversion was lost to history. More often than not, someone on a FTE or Diesel Stop or Oilburners post would inquire about how to expand their fuel capacity, and the mythical story of “some guy did a 44-gallon tank install” would inevitably arise. I spent a good amount of time trying to find that tutorial, but didn’t have any luck. Eventually, I found the contact info for “ajohansson” and attempted to PM him. I figured it was a long shot, since his account was inactive for a while.
Thankfully, he responded really quickly. We struck up a conversation and he reposted the PDF documents. I asked if I could rebroadcast his excellent project on IDI Online, and he gave me permission. I don’t want his work to be lost to the far corners of the internet ever again.
His conversion really hits home for me. Not only is it about Ford Diesels, but also it pertains to my secondary hobby of WVO fuel. You can find more about my WVO work here and my VO conversion documentation here. The first half of Johansson’s process showcases the modifications and fabrication he conducted to make the space and supports for the 44-gallon tank, while the second half tends to pertain more to the specifics of his VO conversion. The two projects overlap some, and it’s a great fusion of the two worlds.
For the most part, his process is nearly identical to what he originally posted back 2012. To make his PDF more readable and internet friendly, I processed his document to extract the images and text. Some of the images had some darkness problems that made it hard to contextualize the install. I cleaned up the images, improving resolution, clarity, brightness, contrast, and any other imperfections that might have needed attention. Lastly, I cropped and touched up the tifs with Photoshop, then saved them in a web friendly format for easy download.
Enough of my rambling, here is the great work of Andreas Johansson, installing a 44-gallon tank in a F-350.
Super Duty Excursion Tank Install on a late 1999 F350 – 4×4 Shortbed.
Sourced an Excursion Tank, bracket and sending unit from www.car-part.com .
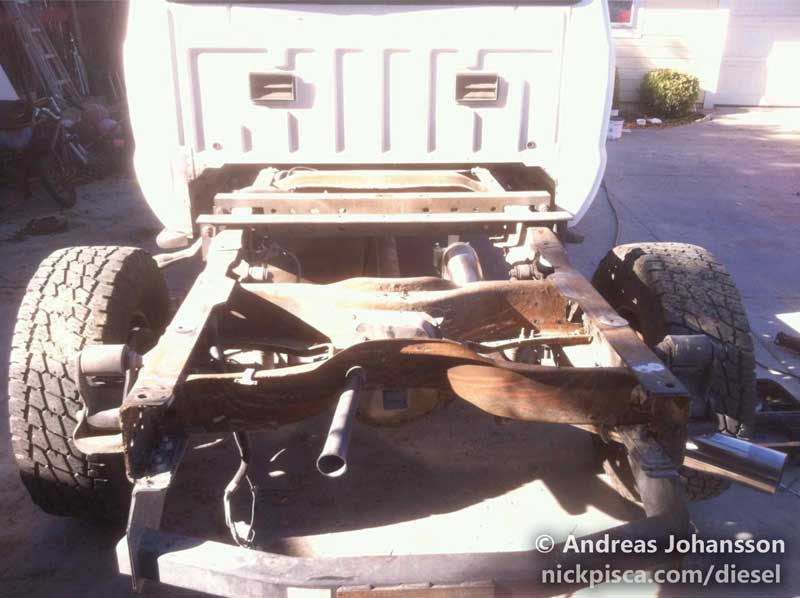
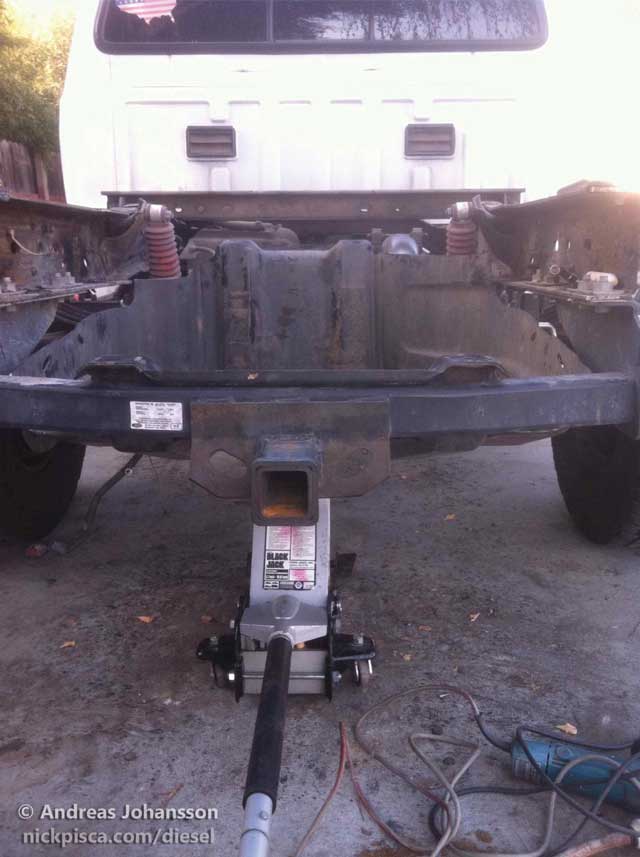
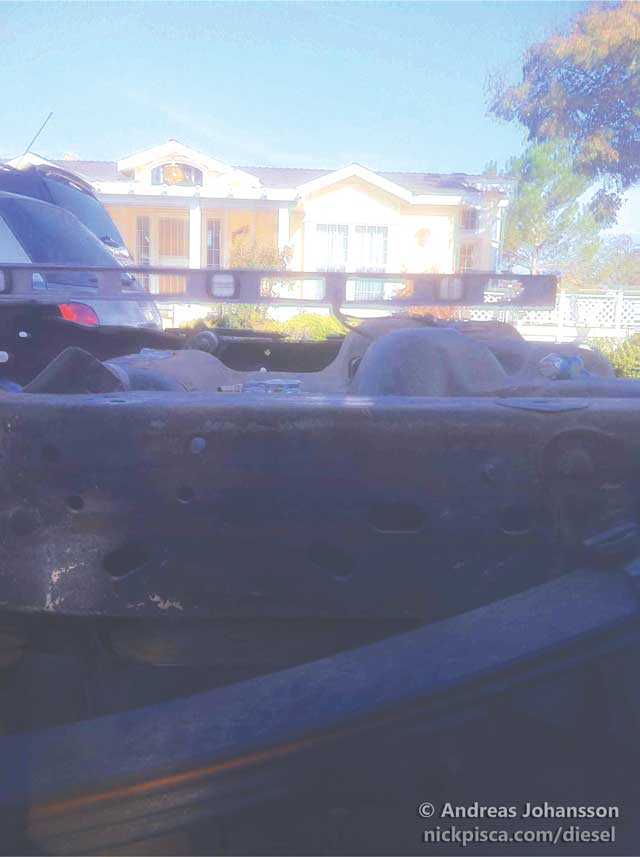
Process – Remove Spare tire, then bed and then the X brace.
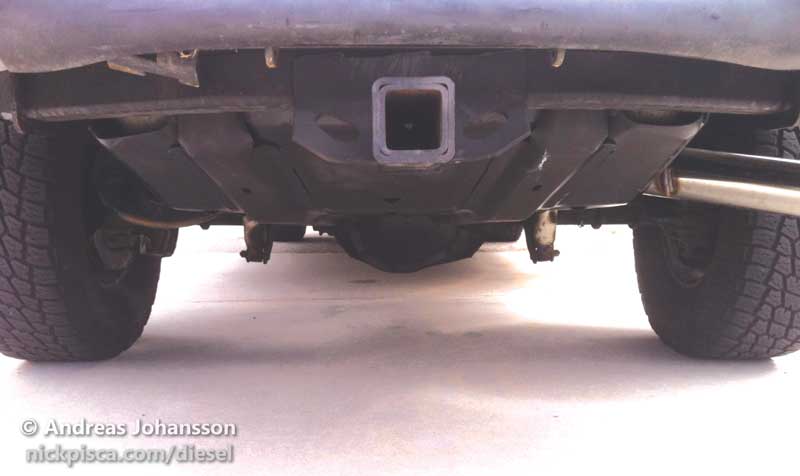
I purchased truck with a Gooseneck Hitch already installed. I welded angle iron onto the goose neck hitch brace to mount my tank bracket. The gooseneck is also nice because it provided frame stability once you take X brace out. Another nice thing is the gooseneck is handy for mounting your spare tire on. I will add picture soon for how that works with a little fabricating I came up with.
Having an underbelly tank is nice especially with a shortbed. If I need to put big stuff in like plywood I can put it on top of the spare tire if the object wont work I just will take the spare out for the short trip. Most of the time I drive this to work and back. There are lots of other options for spare tire mounting.
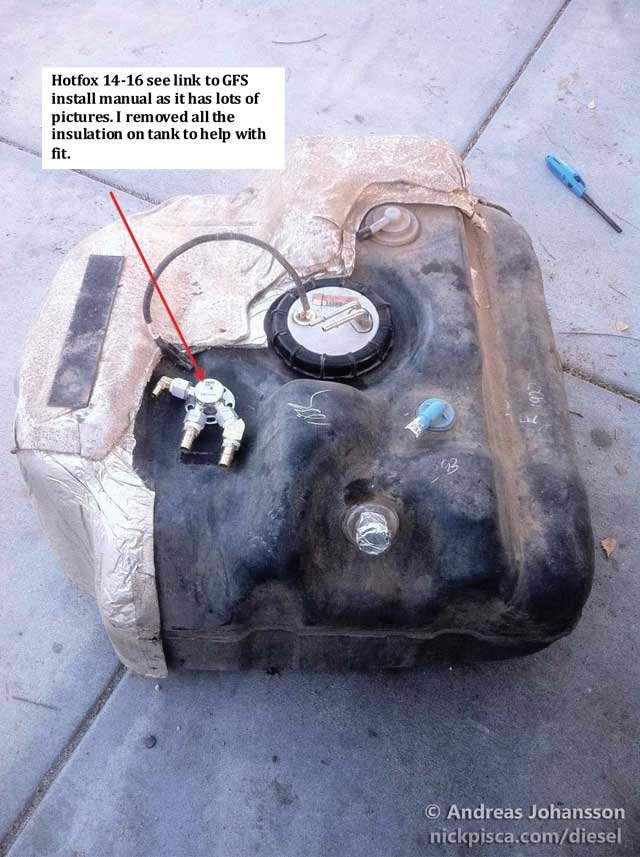
Another nice thing about the X tank is the sending unit and its really thick poly plastic. Hotfox easily installs on this tank. I spliced in both sending units to a SPDT relay. So at rest with the VO system off the stock gauge reads the diesel tank sending unit and when I turn VO on it reads the VO tank sending unit.In wire loom on drivers frame rail the black with orange stripe is the ground to the sending unit and the smaller 18 gauge yellow wire is the sending unit “power”. Get a SPDT Bosch style relay. hook the stock F-350 tank power wire “yellow” from the sending unit to the 87a. Hook the power wiring from the excursion tank to the 87. run the yellow wire you cut that runs to the gauge to the 30 position. Put a switch in the cab to that will run power to the 85 on the relay. Ground 86 and ground both sending units. When you power the switch you have excursion tank. when its off you have stock tank. You could have that same switch power a separate fuel pump for your excursion tank or have switch valves or what ever you want.
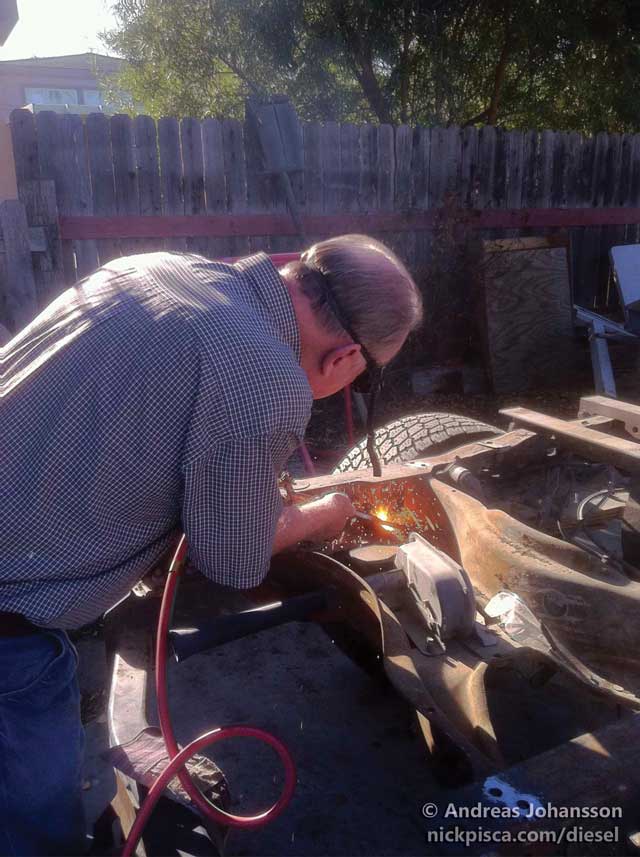
Torch these rivets out.

My 78 year old dad kickin’ ass with the torch….
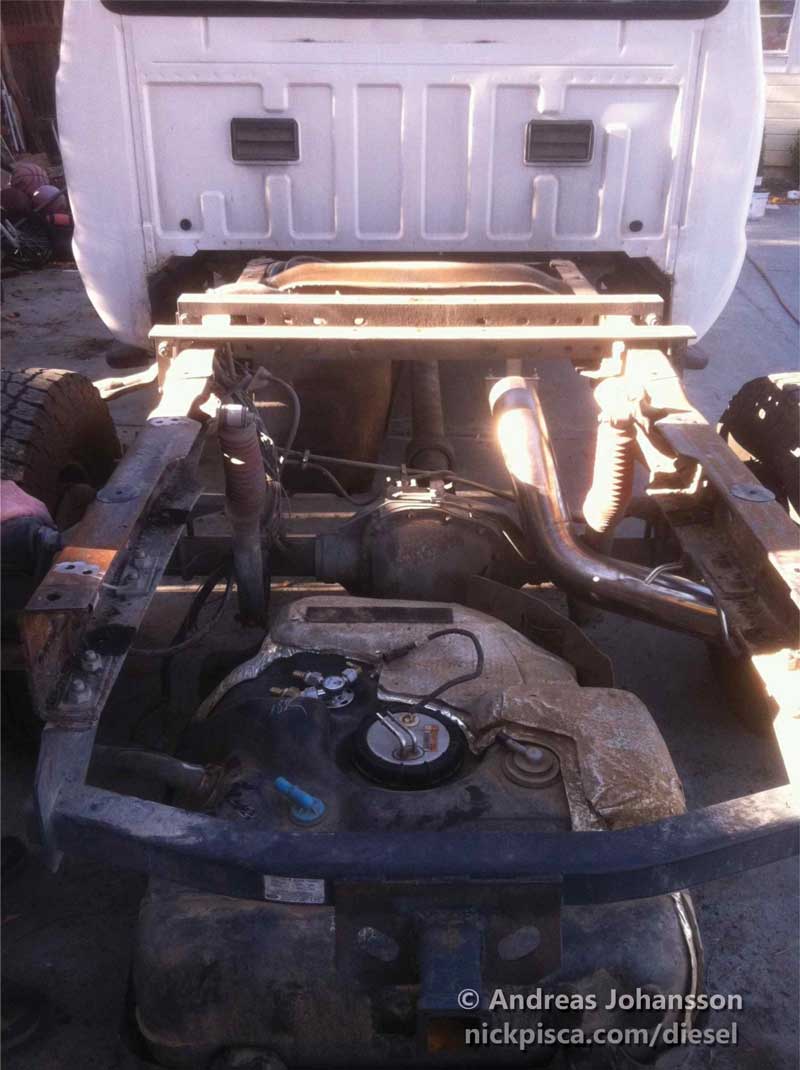
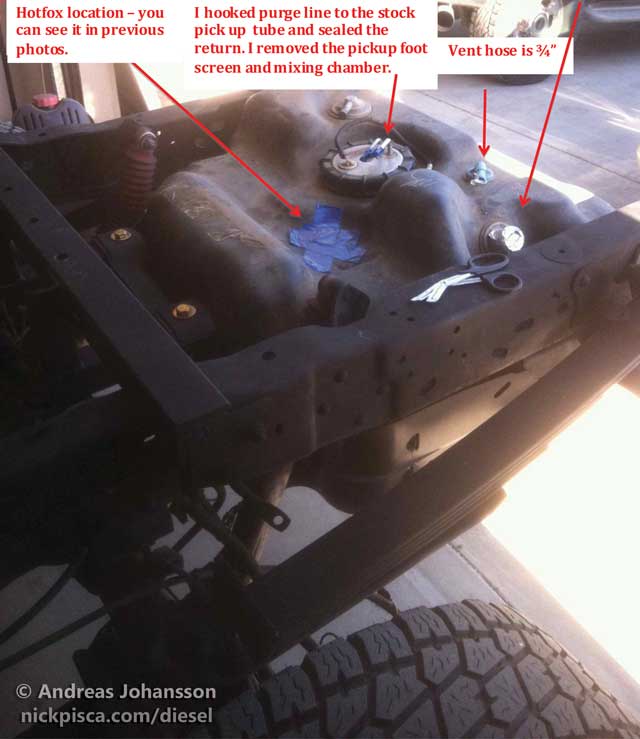
Hotfox 14-16 see link to GFS install manual as it has lots of pictures. I removed all the insulation on tank to help with fit.
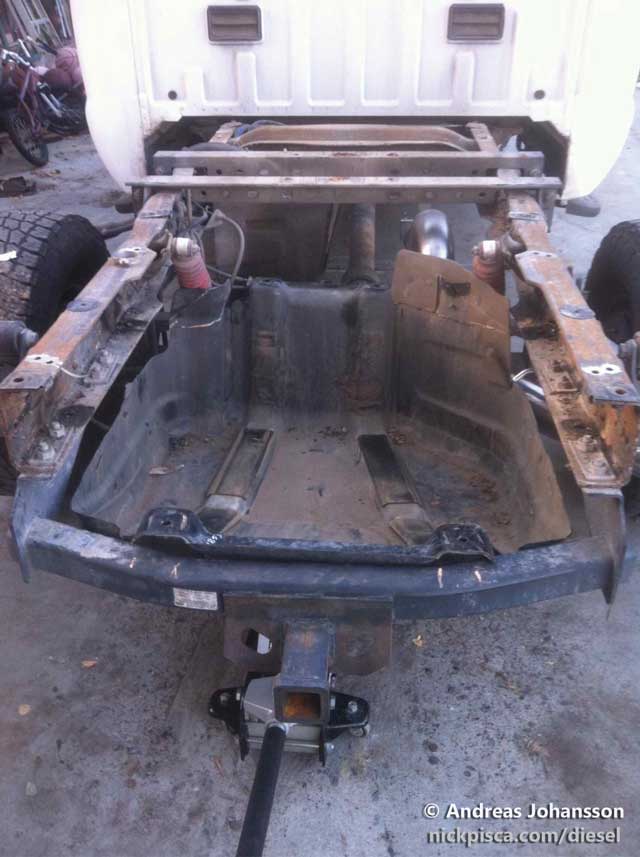
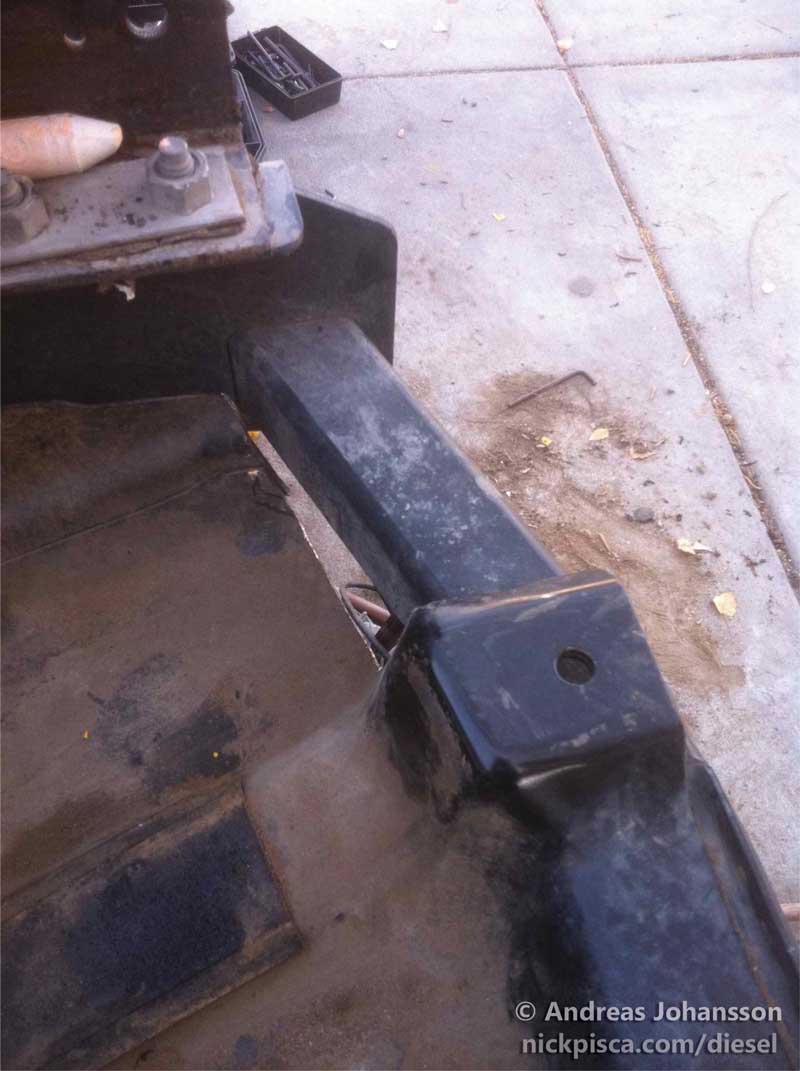
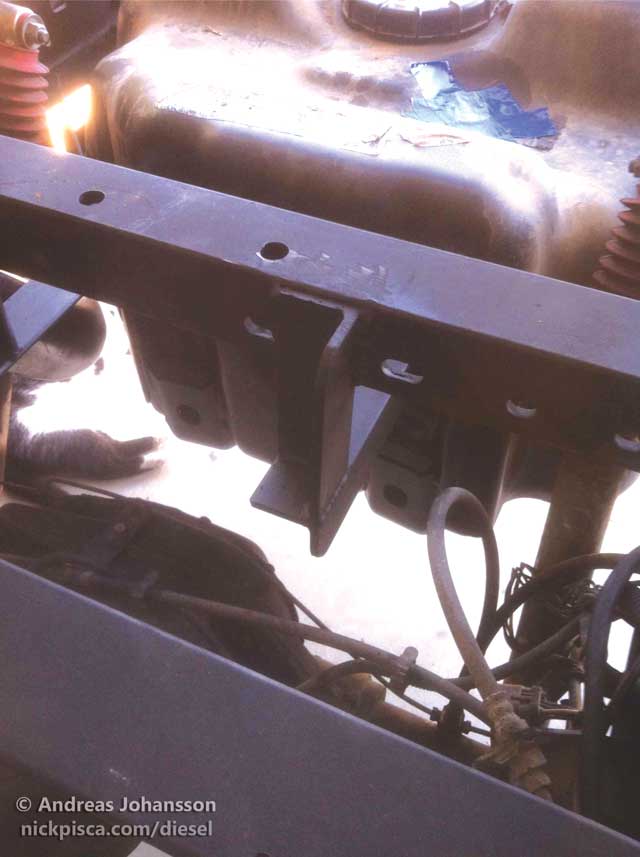
Gooseneck brace (below)

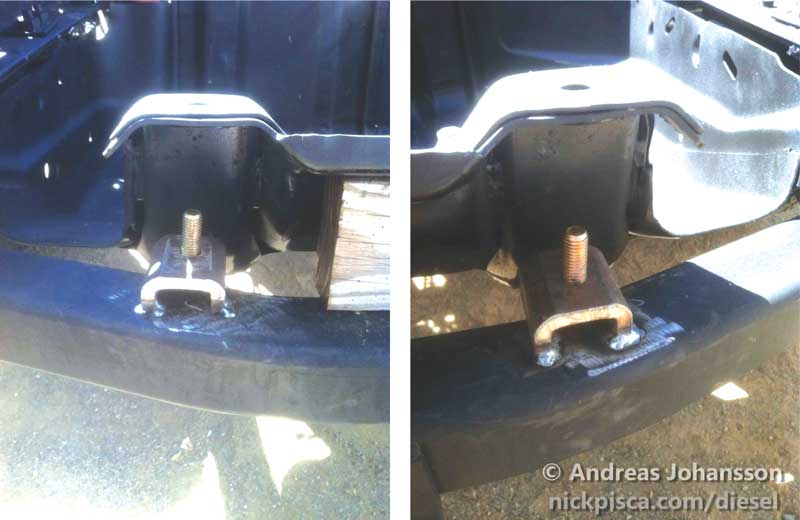
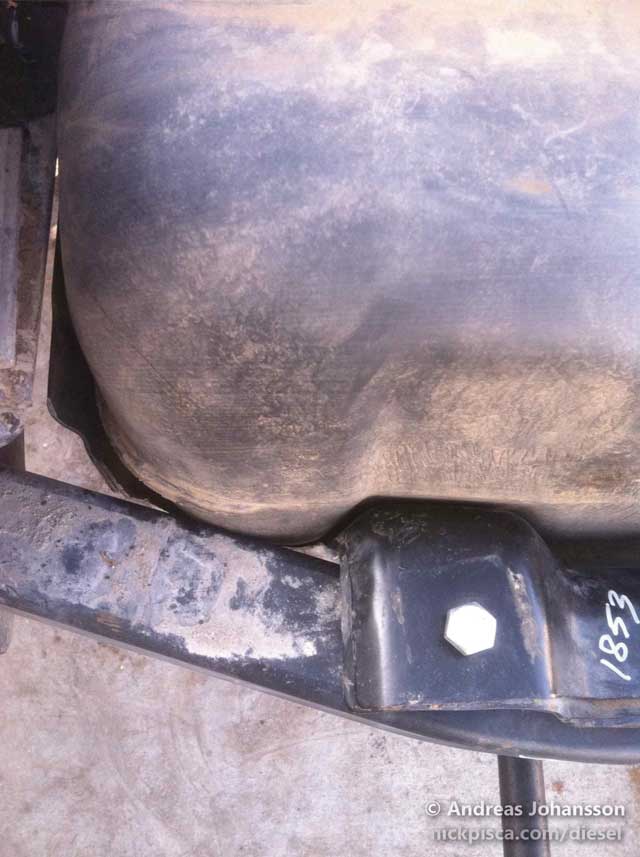
In hindsight I would have lowered this ¼” as it was a tight fit with the bed on. I had to remove the heat shield under the bed to make it fit. Had I made this ¼” lower it all would have fit well. Basically the closer you can get the tank bracket to the hitch the better.

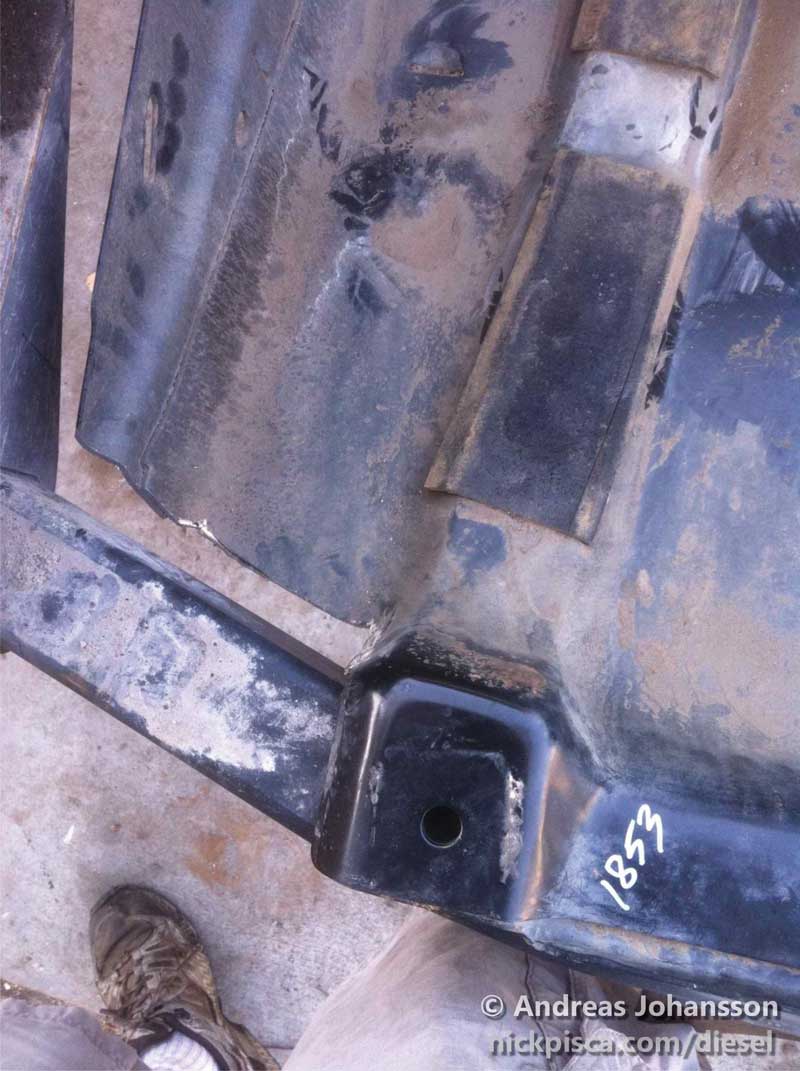
Angle Iron welded to gooseneck brace for tank bracket.
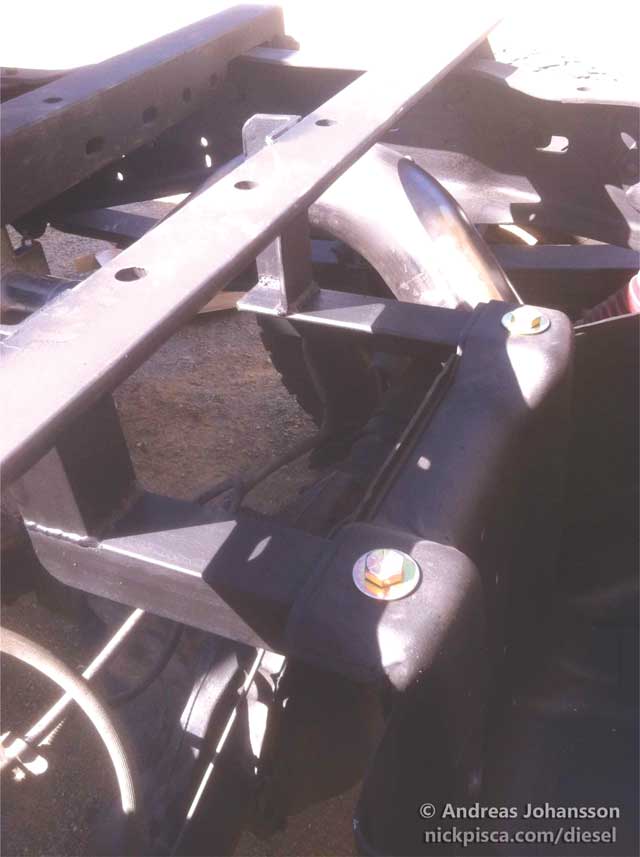
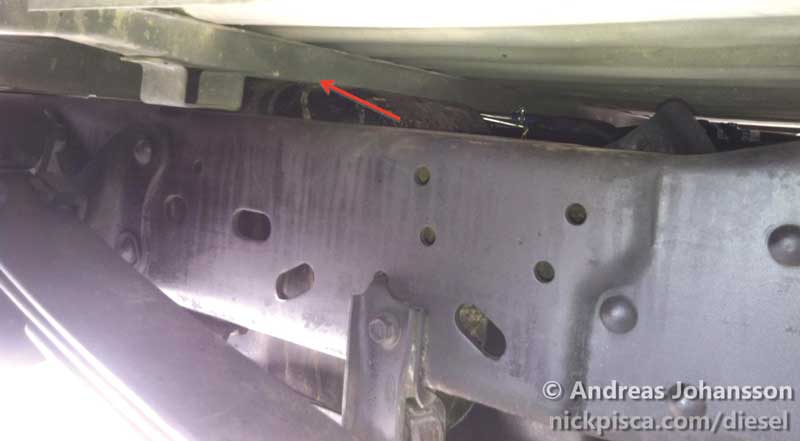
My apologies for not taking a finished picture. Gates Fuel Filler neck hose Part # 24715 1.5” I.D. 90 degree. I shortened the end of one side to mount to tank so it would clear the frame rail. Fill and vent hose go up and over frame to dual fuel port. (see the following pics)
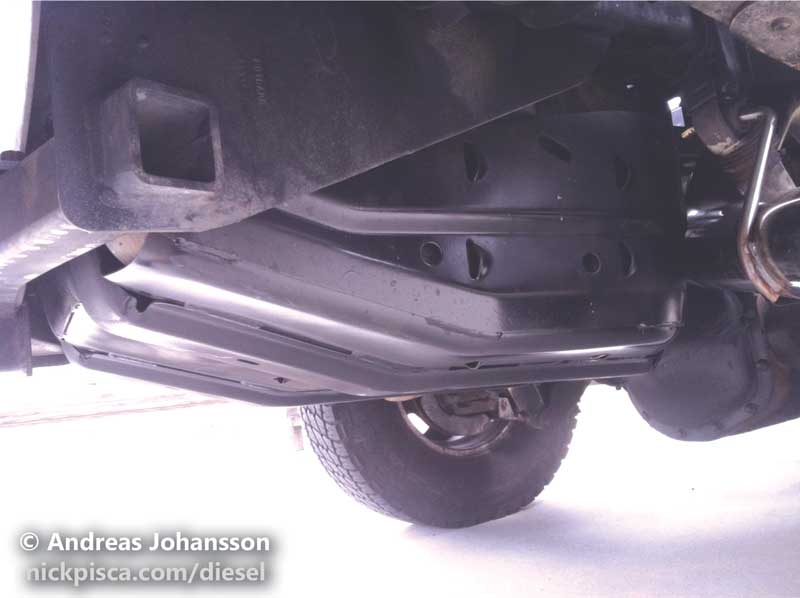
The excursion tank barely clears. The tank bracket needs to be as close as possible to the top of the hitch as possible. I had to remove the heat shield because the screw heads were hitting the top of the tank. The tank is very thick plastic. When I measured I had the bracket sitting on the hitch as you could see in previous pictures when the bracket was mounted it was ½” higher. Get the bracket as close to the hitch as possible.
I’m not a huge GFS fan but I like the dual fill port which is basically two 1” female pipes welded to a piece to fit in the fuel port. I have that in my excursion too. I used a lot of the pictures and documentation from the GFS Excursion install manual to do the Hotfox install.
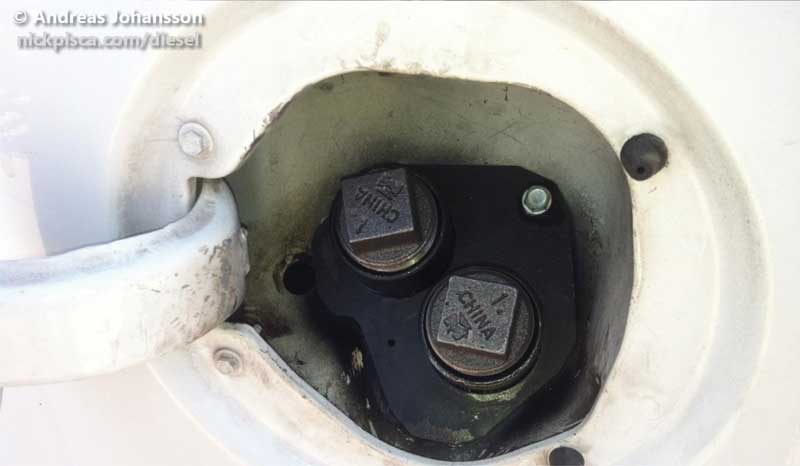
You can see the ¾” vent hoses and 1” fuel fill lines.
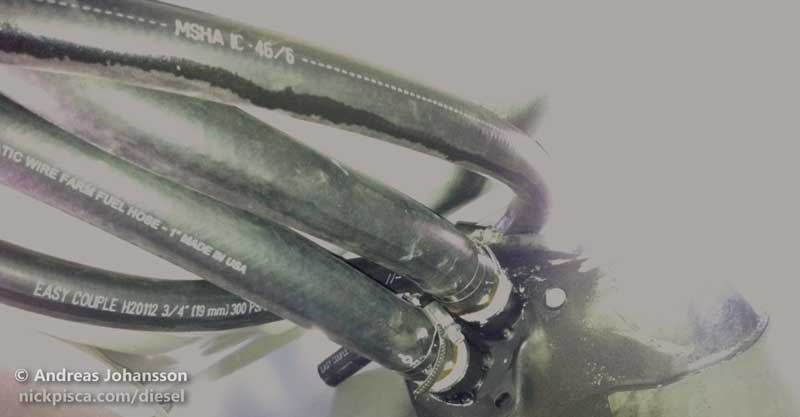
Back side of dual fuel port. 1” Barb x 1” MPT – I used 1” fuel transfer hose this hose meets up to the stock rubber 1.5” fuel filler neck hose. To make the mend I used a 1.5” Dixon Valve – Female King Short Shank in aluminum with a brass swivel. This screws onto a 1.5” x 1” bushing you can see below that has another 1” barb. Technically I didn’t need the barb as the fuel transfer hose comes with a 1” male threaded end. I used a 15 foot fuel transfer hose as it was the cheapest source of 1” fuel rated hose and it comes with 1” male ends! After I cut the first one off I figured that out. The fitting at the rear tank is using the 1” fitting that came on the hose.

Excursion Tank fill hose with Female King Short shank screwed into the 1.5” x 1” bushing with the fuel transfer hose fitting screwed into it. I was really wanting a straight barb but the guy at my local “has it all” industrial supply center showed me this and after I did this I figured it will be much easier to disconnect the hoses when I take the bed off to get the dent out of the back of the cab and bed when I can afford it. Previous owner jack knifed goose neck trailer both ways. I need to wrap that coupling though to protect it or protect the frame.

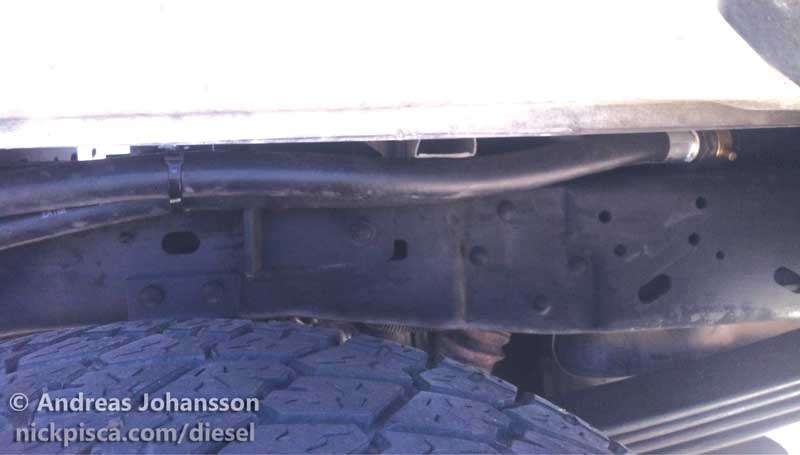
Fill hose and vent hose from excursion tank running over frame rail to fuel fill port.
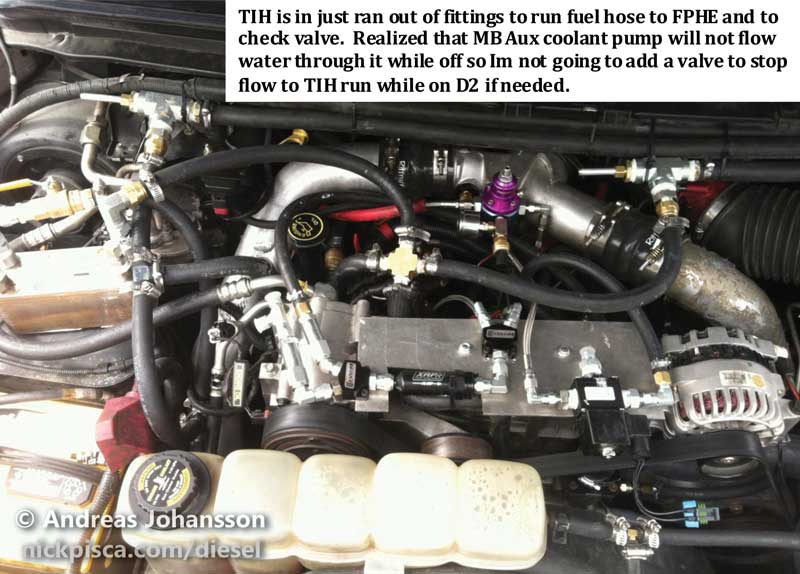
TIH is in just ran out of fittings to run fuel hose to FPHE and to check valve. Realized that MB Aux coolant pump will not flow water through it while off so Im not going to add a valve to stop flow to TIH run while on D2 if needed.


That concludes Andreas’ write up. He also gave me permission to rebroadcast his gooseneck spare tire mount project which I might append to this article in the future. It’s a pretty ingenious solution to his lack of a spare tire. I’d like to thank Andreas for letting us post this. He says that recently he doesn’t have the free time to keep collecting and burning veggie oil, but he says the F-350 is still running great.
No warranty. You are responsible for your vehicle. For educational use only. Not responsible for anything or anyone. Not responsible for damage to your vehicle, you, or anyone or anything.
Copyright 2000-2019 Nick Pisca 0001D LLC
